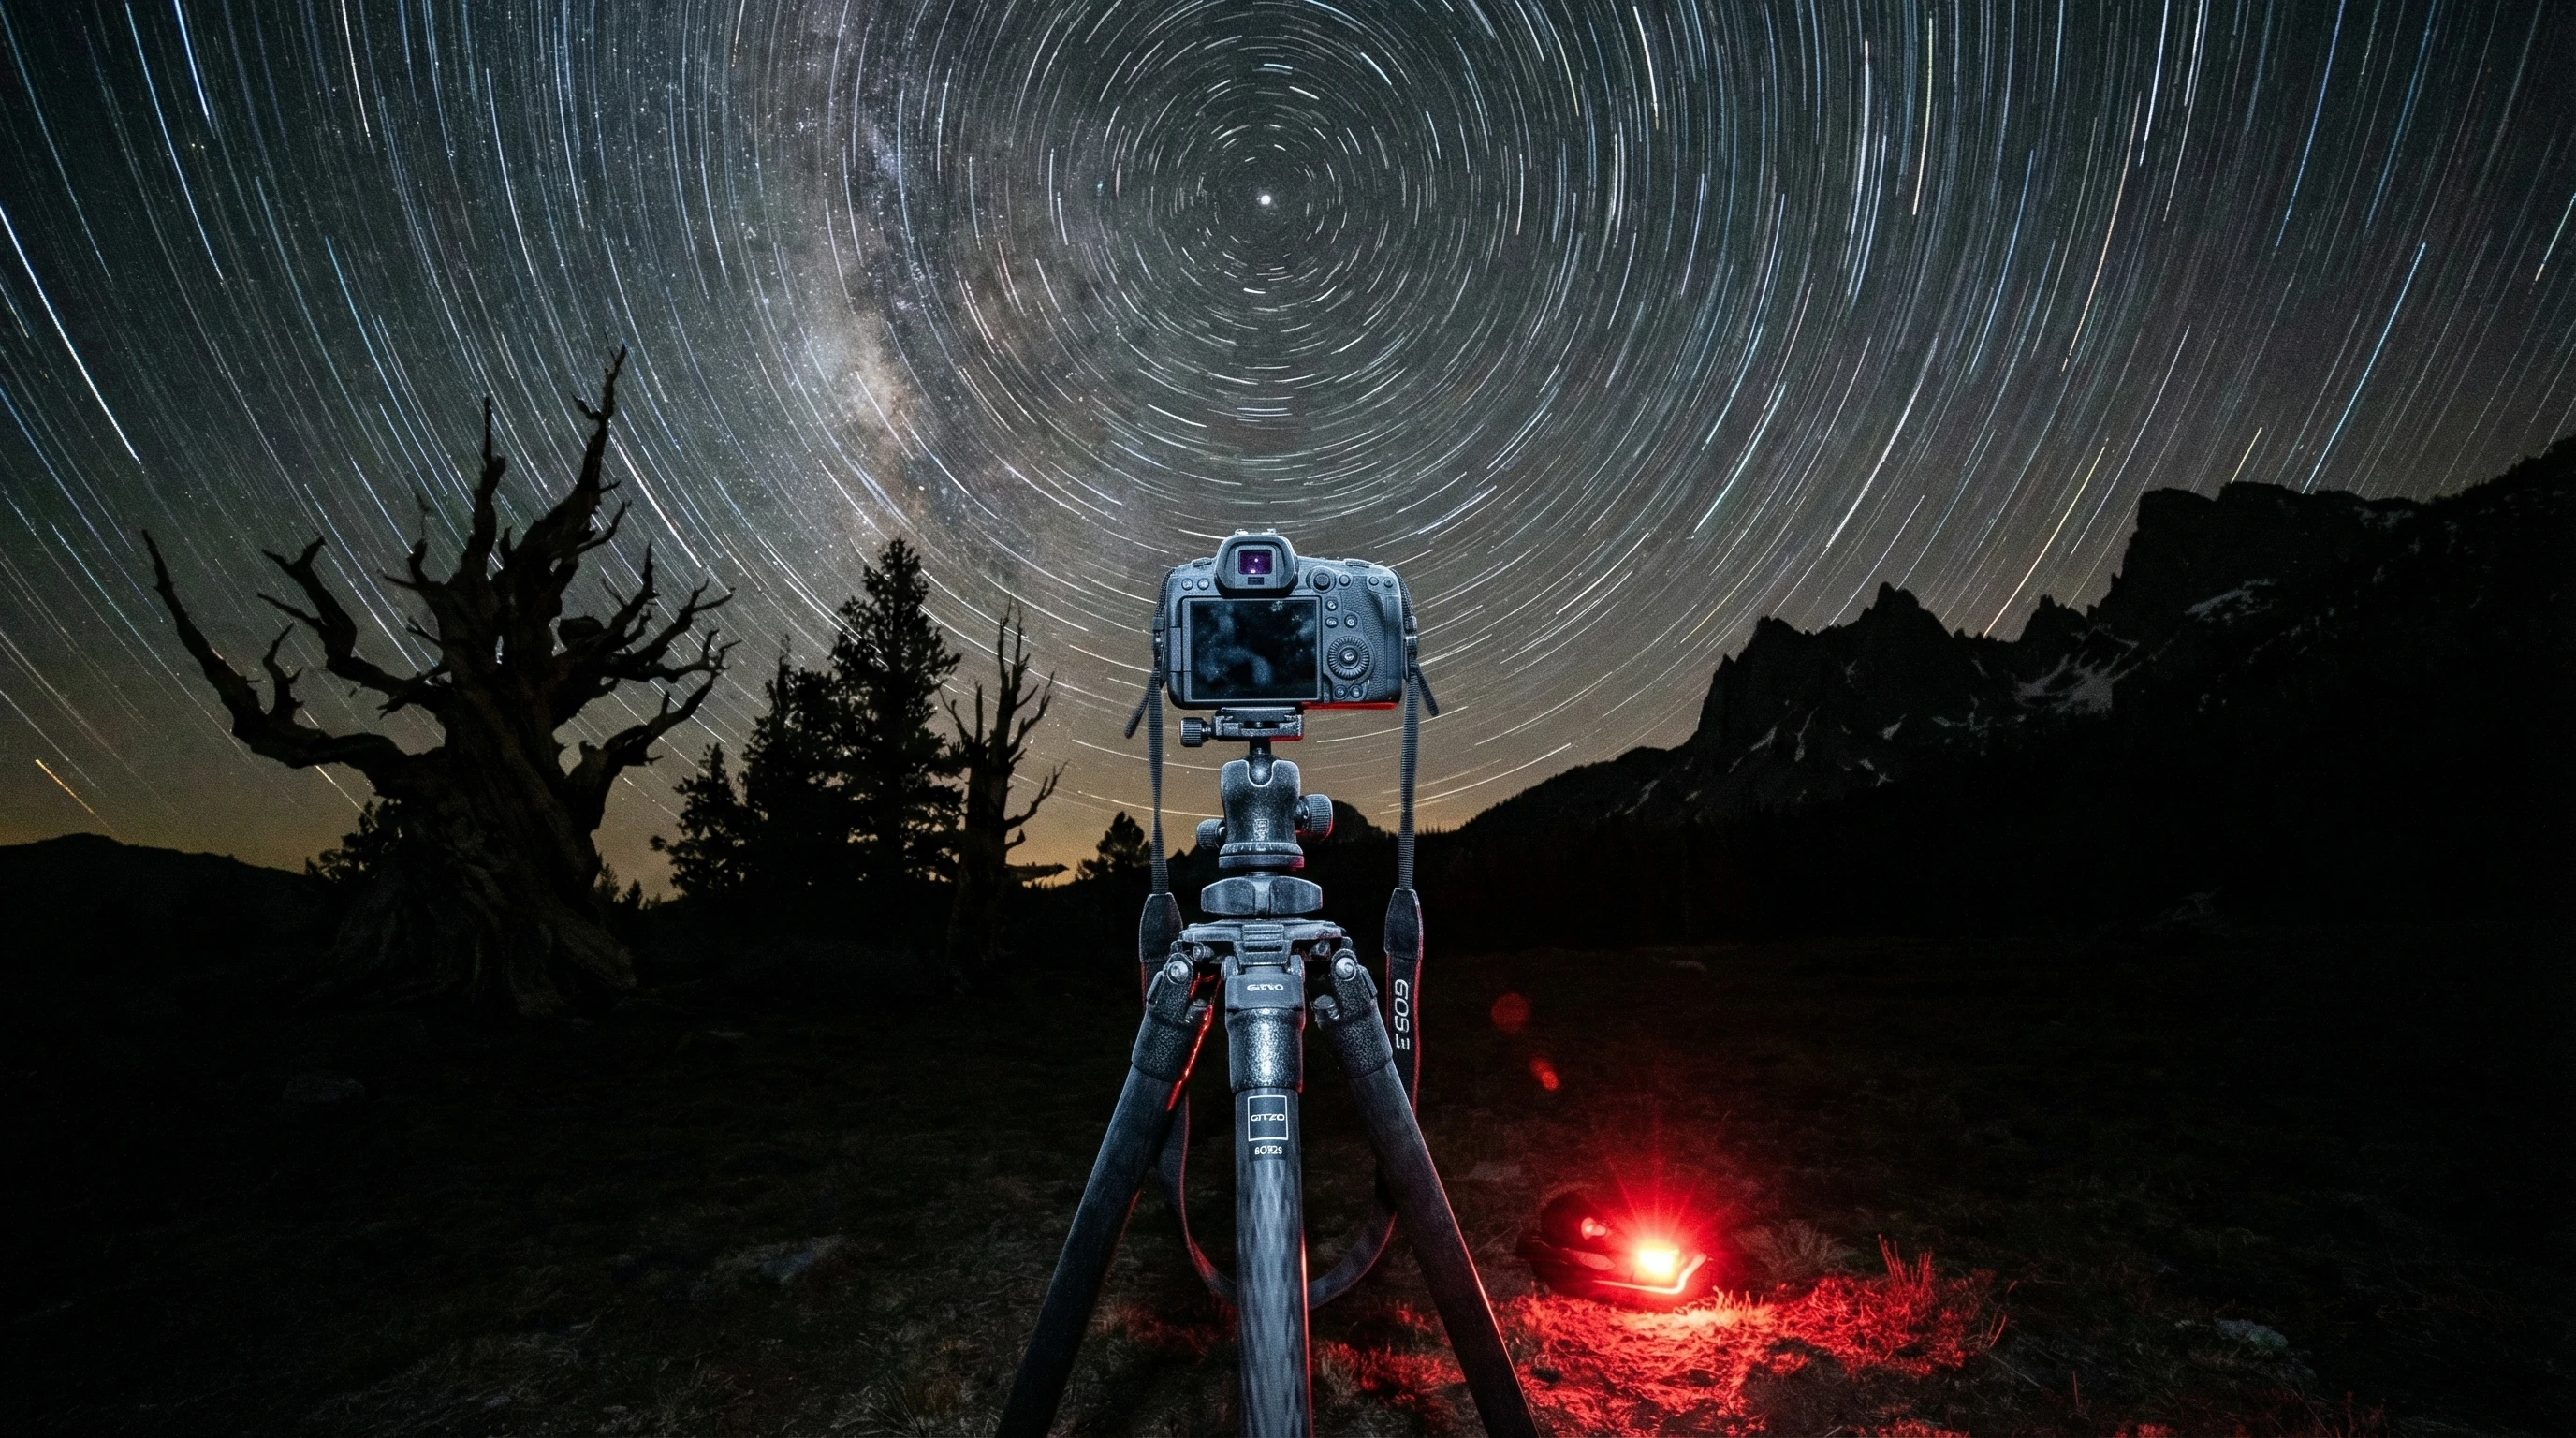
Shooting star trails with a DSLR and tripod feels a lot like stumbling upon a hidden superpower. With the right setup, anyone can capture the sweeping curves of stars across the night sky. For folks who are curious about long-exposure astrophotography and want to create those eye-catching star-filled images, I’m going to break down everything you need—gear, technique, and some handy tips—so you can get rolling even if you’ve never pointed your camera at the sky before.
Basic Gear for Capturing Star Trails
As an Amazon Associate I earn from qualifying purchases.
Using a DSLR and tripod to photograph star trails comes with a few gear needs that make the whole process easier. Here’s what I always pack for a night of shooting under the stars:
- DSLR or Mirrorless Camera: Full manual controls are important. Any model with a manual mode will do the trick.
- Sturdy Tripod: Since exposures can last several minutes or even hours, a steady tripod is a life-saver for sharp images.
- Wide angle Lens: Lenses in the 14–24mm range let you get more sky into your frame.
- Remote Shutter Release: A cable or wireless remote cuts out camera shake when you trigger the shutter. Some cameras have a builtin intervalometer that makes stacking super simple.
- Extra Batteries and Storage Cards: Long exposures eat up battery life and memory quickly, so always bring extras.
- Headlamp with Red Light: Red light protects your night vision while you work in the dark.
Keeping gear simple makes setup quicker, so you can focus on what counts—the photography itself.

Understanding Star Trails and How They Work
Star trails show up as curved lines in the sky, thanks to Earth’s rotation. When your camera’s shutter stays open for a long time, the stars seem to move across the frame, leaving beautiful light trails. The longer your exposure, the longer the trails will be. If you haven’t tried it before, remember that star trails don’t show up during meteor showers (“shooting stars”); you’re photographing the steady movement of regular stars as they appear to orbit the celestial poles.
Picking the right night and location helps a lot. Shoot outside the city, on a new moon or when there’s little moonlight, to spot more stars.
Step-by-Step Guide to Shooting Star Trails
Getting solid star trail shots is about following a few steps:
- Scout a Dark Sky Location: Try to get at least 20 miles away from major city lights. Use darksky maps like Light Pollution Map to find good spots.
- Show Up Early: Set up at twilight so you’re ready once the sky is dark.
- Compose Your Shot: Point north (Northern Hemisphere) or south (Southern Hemisphere) if you want circular trails centered on the celestial pole. Line up a cool landscape feature (trees, mountains, a cabin) in the frame if you can.
- Set Up Your Gear: Level your tripod, attach the camera, and fix your lens. Make sure everything is solid and locked down.
- Set Camera Settings: Start here: ISO 800–1600, aperture f/2.8–f/4, shutter speed 20–30 seconds (if stacking), or Bulb mode for long single exposures. Manually focus to infinity before you begin—autofocus hardly ever works at night.
- Take the Shots: For stacking, shoot between 20–100+ consecutive images with little pause between frames. For a single shot, use Bulb or Time mode and keep the shutter open for 30 minutes or longer (but be aware this can create sensor noise and hot pixels).
Getting comfortable with your gear in the dark might take a bit, but with time, it will feel natural.

Troubleshooting Common Challenges
Shooting in the dark isn’t without hiccups. Some of the biggest headaches include:
- Unwanted Light Pollution: Even small towns throw a glow on the horizon. Find the darkest spot you can and use lens hoods to block stray light.
- Focus Troubles: Autofocus doesn’t work well at night. Use live view, zoom in on a bright star or distant light, and focus manually.
- Condensation: Dew fogs up your lens. Bring lens wipes and use a hand warmer taped to the lens barrel to keep it clear.
- Battery Drain: Long exposures and cold air kill batteries fast. Keep extras in a warm pocket and change them as needed.
- Sensor Noise: High ISO and long exposures mean more noise and hot pixels. Stacking shorter exposures sidesteps this problem.
Light Pollution
Total darkness is rare near a city, but there are ways around it. Use tools like DarkSky to pick a solid location. Steer clear of nights with a full moon—the extra light washes out fainter stars.
Getting Sharp Focus
Many folks struggle with focusing at night. Switch to live view, open your aperture wide, and carefully adjust until a star becomes a tight dot. Lock your ring in place with a small bit of gaffer’s tape so it doesn’t drift during the shoot.
Managing Dew and Moisture
Dew can sneak up on cooler, humid nights and ruin a session. I’ve learned to prep hand warmers or lens heaters, or sometimes just wipe the lens with microfiber cloths. A little planning here saves a lot of frustration later.
Battery Tips for the Field
Bring at least two fully charged batteries to every session. The cold drains power quickly, so keep your extras in a warm inside pocket. This little step guarantees you never have to cut your night short on account of dead gear.

Advanced Star Trail Tips
Ready to take your star trail photography up a notch? These tips can make your photos pop:
Stack Your Shots: Instead of holding the shutter for an hour, take 50–200 short (30-second) exposures, then combine them using a stacking program like StarStaX. Stacking cuts down noise and gives more editing freedom if something sneaks into a frame.
Add Foreground Lighting: A quick sweep with a dim flashlight on trees, rocks, or buildings in the first few frames adds interest, but keep it subtle so it won’t overpower your foreground.
Switch Up Camera Directions: Shooting east or west makes long, flowing lines, while aiming north or south creates cool spirals around Polaris or the Southern Cross.
Check the Weather and Clouds: Use weather apps and forecast tools to avoid cloudy nights—surprise clouds can spoil a session fast. Apps like Clear Dark Sky are helpful.
What Results Can You Expect?
Beautiful, sweeping arcs or mesmerizing circles of light are the signature of a good star trails photo. Shorter total exposures (say, 15–30 minutes) yield gentle arcs; two hours or more makes the trails nearly loop the entire sky. If you’re in the Northern Hemisphere, point near Polaris for tight, beautiful spirals. In the Southern Hemisphere, Sigma Octantis is the go-to, though it’s dimmer and less dramatic than Polaris.
- Landscape Drama: Add mountains, trees, or even rustic buildings for extra depth and contrast below the vibrant sky.
- Reflections in Water: Mirror like lakes or puddles double the drama, giving your star trails a jaw-dropping look.
- Use Light Pollution Creatively: Sometimes the warm glow of distant cities paints the horizon orange or pink. You can use this effect for creative, moody images instead of fighting it every time.
FAQs About Shooting Star Trails
Beginners usually check in about a few things:
Q: What works best—one very long exposure or lots of shorter ones?
A: Multiple short exposures, stacked after, are less risky and way easier to fix if something goes wrong. You can toss a single ruined frame from your stack, but you can’t undo a whole long shot if it gets interrupted.
Q: How do I keep sharp focus all night?
A: Focus before darkness, tape the ring, and watch your gear so nothing bumps it. Live view and tape are your best friends here.
Q: Is special software needed for editing?
A: Free stacking programs like StarStaX or Sequator are perfect for making star trails. For color and crop adjustments, Lightroom or any general photo editor is plenty.

Bringing Star Trails Into Your Photography Routine
Shooting star trails is a fun way to see the night sky through new eyes. Once you’ve got the basics down, you’ll find endless ways to let your creativity take the wheel. I’ll never forget my first real star trail image—it was thrilling to capture something so cool with pretty basic gear and some extra patience.
Give it a go! Pick a clear night, charge every battery, and aim your lens up. The thrill of seeing those wild, swirling arcs on your camera never gets old. Wrapping up, remember to experiment and enjoy the adventure—every star trail you shoot is unique and rewarding.