Freezing and panning are two really handy camera techniques that can make your action photography a lot more exciting. These tricks let you either freeze a fast subject in a sharp, crisp frame or blur the background for that cool feeling of motion. A lot of people find them a bit tricky to master, but with a bit of practice and the right know-how, these techniques can totally change your sports, wildlife, or street photography.
Why Freeze and Pan? The Value in Action Photography
Action photography isn’t just about snapping something that moves; it’s about catching the energy of the moment. When I started, I quickly realized that being able to decide whether I wanted to freeze movement completely or show a sense of speed made my photos way more interesting. Freezing a soccer player mid-kick or panning along with a runner so the background blurs, it gives the pictures more energy and makes viewers feel like they’re part of the action.
Photos that capture sharp movement or smooth motion blur usually make a much bigger impact on social feeds, portfolios, or even printed wall art. Both techniques stand out in magazines and online galleries because they showcase both technical skill and creativity. Sharply captured moments and blurred backgrounds can set your work apart and make audiences stop scrolling to give your images a second look.

Understanding the Tools for Freezing and Panning
Getting into action photography is a lot easier when you know what gear you’ll need and how it works. You don’t need the priciest camera, but there are a few things that really help if you want sharp action shots or smooth pans.
- Shutter Speed Control: Your camera’s ability to let you manually set the shutter speed is super important. Fast shutter speeds make freezing possible, while slow ones are key for smooth panning.
- Continuous Autofocus: Tracking a moving subject isn’t easy, and using your camera’s continuous AF mode means more in-focus shots while someone is running or driving by.
- Shooting Modes: Modes like “Shutter Priority” (S or Tv mode) help you pick the right speed while the camera handles the rest of the settings.
- Image Stabilization: Lenses or cameras with builtin stabilization really help offset camera shake when panning, so your subject stays sharp but the background blurs.
- Fast Memory Cards: Shooting quick bursts helps you catch the perfect moment, and cards that can write data quickly mean you’re less likely to miss the shot.
Understanding and setting up your gear is the first step. Learning these camera terms and practicing helps make everything easier down the line. Also, some cameras now offer features like subject tracking or custom AF points, which can be gamechangers for keeping moving targets clear. Get familiar with your camera manual and menus to use these tools well.
How to Start Mastering Freezing and Panning
Getting your head around the basics of freezing and panning speeds up your learning and gets you solid results way faster. Here’s how I usually approach things when I’m setting up for an action shoot:
- Pick a Subject: Whether it’s a cyclist on a trail, a dog chasing a ball, or cars passing by, having a clear subject is step one.
- Choose Your Technique: Decide if you want a frozen action shot (sharp throughout) or a panned effect (subject sharp, background blurred).
- Set the Right Shutter Speed: For freezing, I set my shutter speed to 1/1000th of a second or faster. For panning, I go much slower, usually 1/30th to 1/125th, depending on my subject’s speed.
- Use Continuous Focus: Switch your camera to continuous autofocus mode (AI Servo or AFC). This helps track the moving subject as you shoot.
- Burst Mode: I set my camera to shoot a burst of images in a row. This boosts my chances of getting at least one perfect shot in a fastmoving sequence.
Mixing and matching these settings while experimenting helps you figure out what works best for different sports or activities. When you’re out shooting, don’t hesitate to check your shots on the screen, make small tweaks, and try again. The ability to review instantly is one of digital photography’s main perks, so use it to fine-tune your approach.

Things That Make or Break Action Photos
Just like anything in photography, freezing and panning both come with a few roadblocks you’ll want to know about before heading out. Here’s what I usually watch out for so I’m not caught off guard:
- Lighting Conditions: Bright sunshine makes freezing easy, but you’ll need to bump up your ISO or use wider apertures if it’s cloudy or indoors.
- Background Distractions: When panning, a busy or colorful background might mess with your image. Look for simpler backgrounds for a cleaner motion effect.
- Keeping Subjects Sharp: When panning, it’s really easy for your subject to end up blurry or soft if your timing is even a little off. Practice makes a difference.
- Camera Handling: Quick movements while holding your camera can cause unwanted shake. Using good handholding techniques or a monopod helps, especially for longer panning sessions.
Anticipating these challenges lets you plan ahead, whether it’s by scouting your location or practicing holding your gear steady. If you’re photographing people, try tracking their movements for a few seconds before shooting to match their speed and smooth your panning motion.
Lighting and Shutter Speed
One of the bigger challenges is getting enough light when you’re freezing action. Fast shutter speeds mean less light hits the sensor, so brighter conditions are pretty helpful. If you’re stuck in low light, increasing ISO or using a faster (wider) lens makes a big difference, though watch out for too much noise. Sometimes using an external flash (if allowed) can add some fill light and help keep your images crisp in dim situations. Also, choosing the right time of day, like early morning or late afternoon, can give you more even and flattering light.
Managing Backgrounds
Especially with panning, the background can either help or hurt your photo. I always try to spot background elements that won’t clash with my main subject. Fences, poles, or other moving people can sometimes spoil an otherwise awesome pan shot. It helps to scout the area beforehand and pick spots that let subjects move through cleaner backdrops.

Tips for Freezing Fast-Paced Action
Nailing a sharp photo of someone midjump or a bird taking flight feels really rewarding. Here are a few things that work for me when freezing motion:
- Bump Up Shutter Speed: Shooting at 1/1000 sec or even faster is a good rule of thumb.
- Choose the Right AF Point: Focus points placed directly on the subject’s face or nearest eye (if possible) help keep things razorsharp.
- Track and Anticipate: Pay attention to the flow of action, whether it’s a runner approaching a hurdle or a dog about to leap for a frisbee. Being ready just before the key moment gives you a better chance to get the shot.
- Use Wide Apertures: F/2.8 or f/4 let in more light and can help keep backgrounds blurred for extra pop.
Getting the hang of these steps over time means more sharp, dynamic photos every time you shoot. Try practicing during local outdoor events or sports matches; repeating the process in real-world scenarios helps lock in muscle memory and confidence.
Panning for Motion: Making Movement Pop
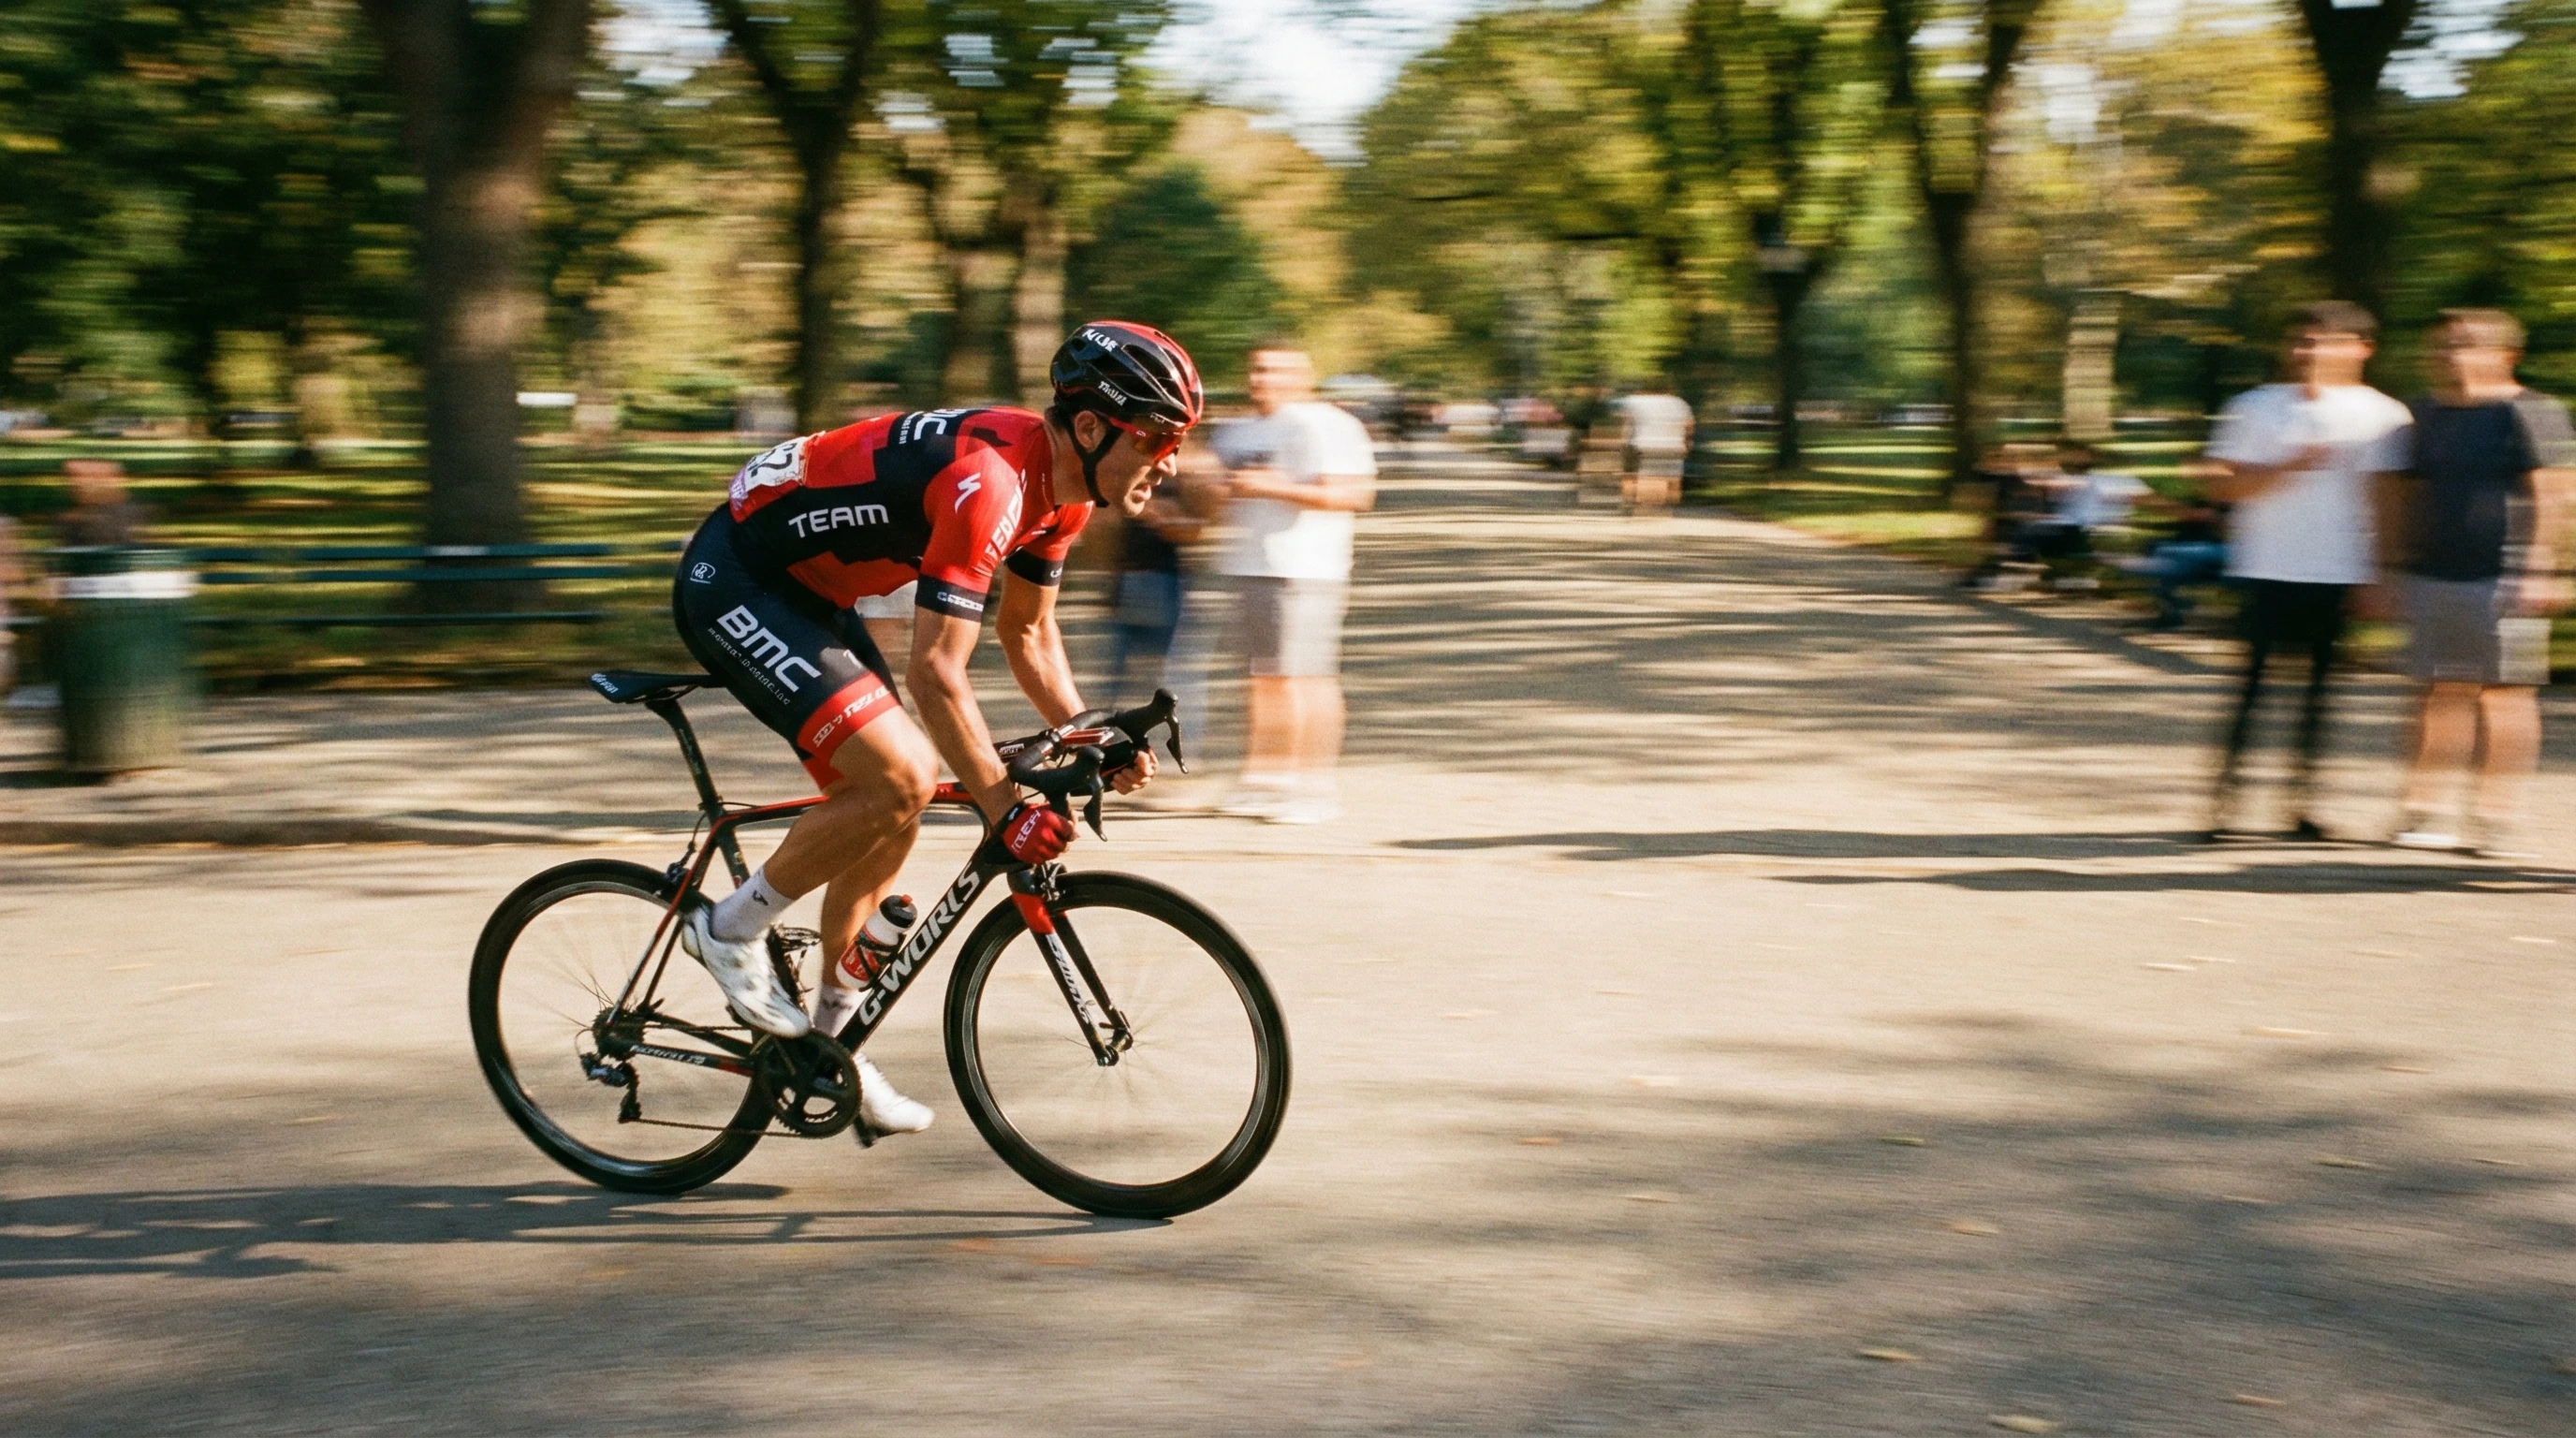
Panning is better for those photos where you want to show speed, like a racecar speeding down the track or a bike zipping by. Here’s the usual flow I follow:
- Start with a Medium Shutter Speed: 1/30 to 1/125 second is a good starting point for beginners. The faster your subject, the faster the shutter speed can be without losing the motion blur in the background.
- Feet ShoulderWidth Apart: I stand steady and twist from my waist, following the subject smoothly through the frame.
- Follow Through: Even after pressing the shutter, continue to pan at the same speed for a smoother effect.
- Experiment: Not every shot will turn out. The more you practice, the more often you’ll land that perfectly panned, sharp subject with a beautifully streaked background.
These techniques help add some serious wowfactor to shots of racing cars, cyclists, or even animals running through fields. You can even try creative panning with slower speeds to add artistic flair, like capturing glowing streaks at night with city traffic.

Freezing and Panning in Real Life: Practical Uses
Both freezing and panning play big roles beyond just sports. Here are a few places I see these techniques come in handy:
- Sports Events: Freezing critical moments, a basketball dunk, a soccer goal, or a tennis serve, can produce photos that make headlines or become epic posters.
- Street Photography: Freezing skateboarders midair or panning along with bicycles adds an urban edge to photos.
- Wildlife: Bird watchers and nature enthusiasts can freeze a bird’s wings in flight or pan as a deer bolts through a forest, creating dramatic action shots.
Anywhere there’s movement, these techniques help you tell stories and capture the excitement of real life. You can even use them for family moments with kids at play or pets running in the backyard; action techniques often work in settings where you might not expect them to shine.
FAQs: Common Questions I Hear About Freezing and Panning
Question: Do I need a fancy or expensive camera to try these techniques?
Answer: Not really. Any camera with manual shutter control can do the job. Higherend gear will make things easier, but practice and understanding the basic ideas matter way more.
Question: My panning shots are all blurry. What should I do?
Answer: Stay steady, follow the subject with your body (not just your arms), and shoot lots of frames. Don’t be discouraged; most people only get a few sharp shots per session at first.
Question: How do I know which shutter speed to use for panning?
Answer: It depends on how fast your subject is moving and how much blur you want. Faster subjects need faster shutter speeds, but a bit of trial and error teaches you what looks best for each situation.
Bringing It All Together: Your Next Steps in Action Photography
Learning how to freeze and pan opens up so many new possibilities for creative shots, whether you’re at the skatepark, a local game, or capturing wildlife. With a bit of patience and regular practice, you’ll start to see a real difference in your photos. Don’t be afraid to experiment, check out work from other action photographers, and keep challenging yourself with new subjects and settings. Every action scene is a new chance to capture a story in a split second.