Getting sharp and striking images with macro photography often comes down to how well you manage manual focus. Autofocus can struggle with those up-close shots, missing tiny details or picking the wrong part of your subject. Mastering manual focus puts you in charge, helping you nail details that really make macro shots pop. Here are my top tips and techniques so you can take your macro photography up a notch and feel more confident every time you press the shutter.
Why Manual Focus Matters in Macro Photography
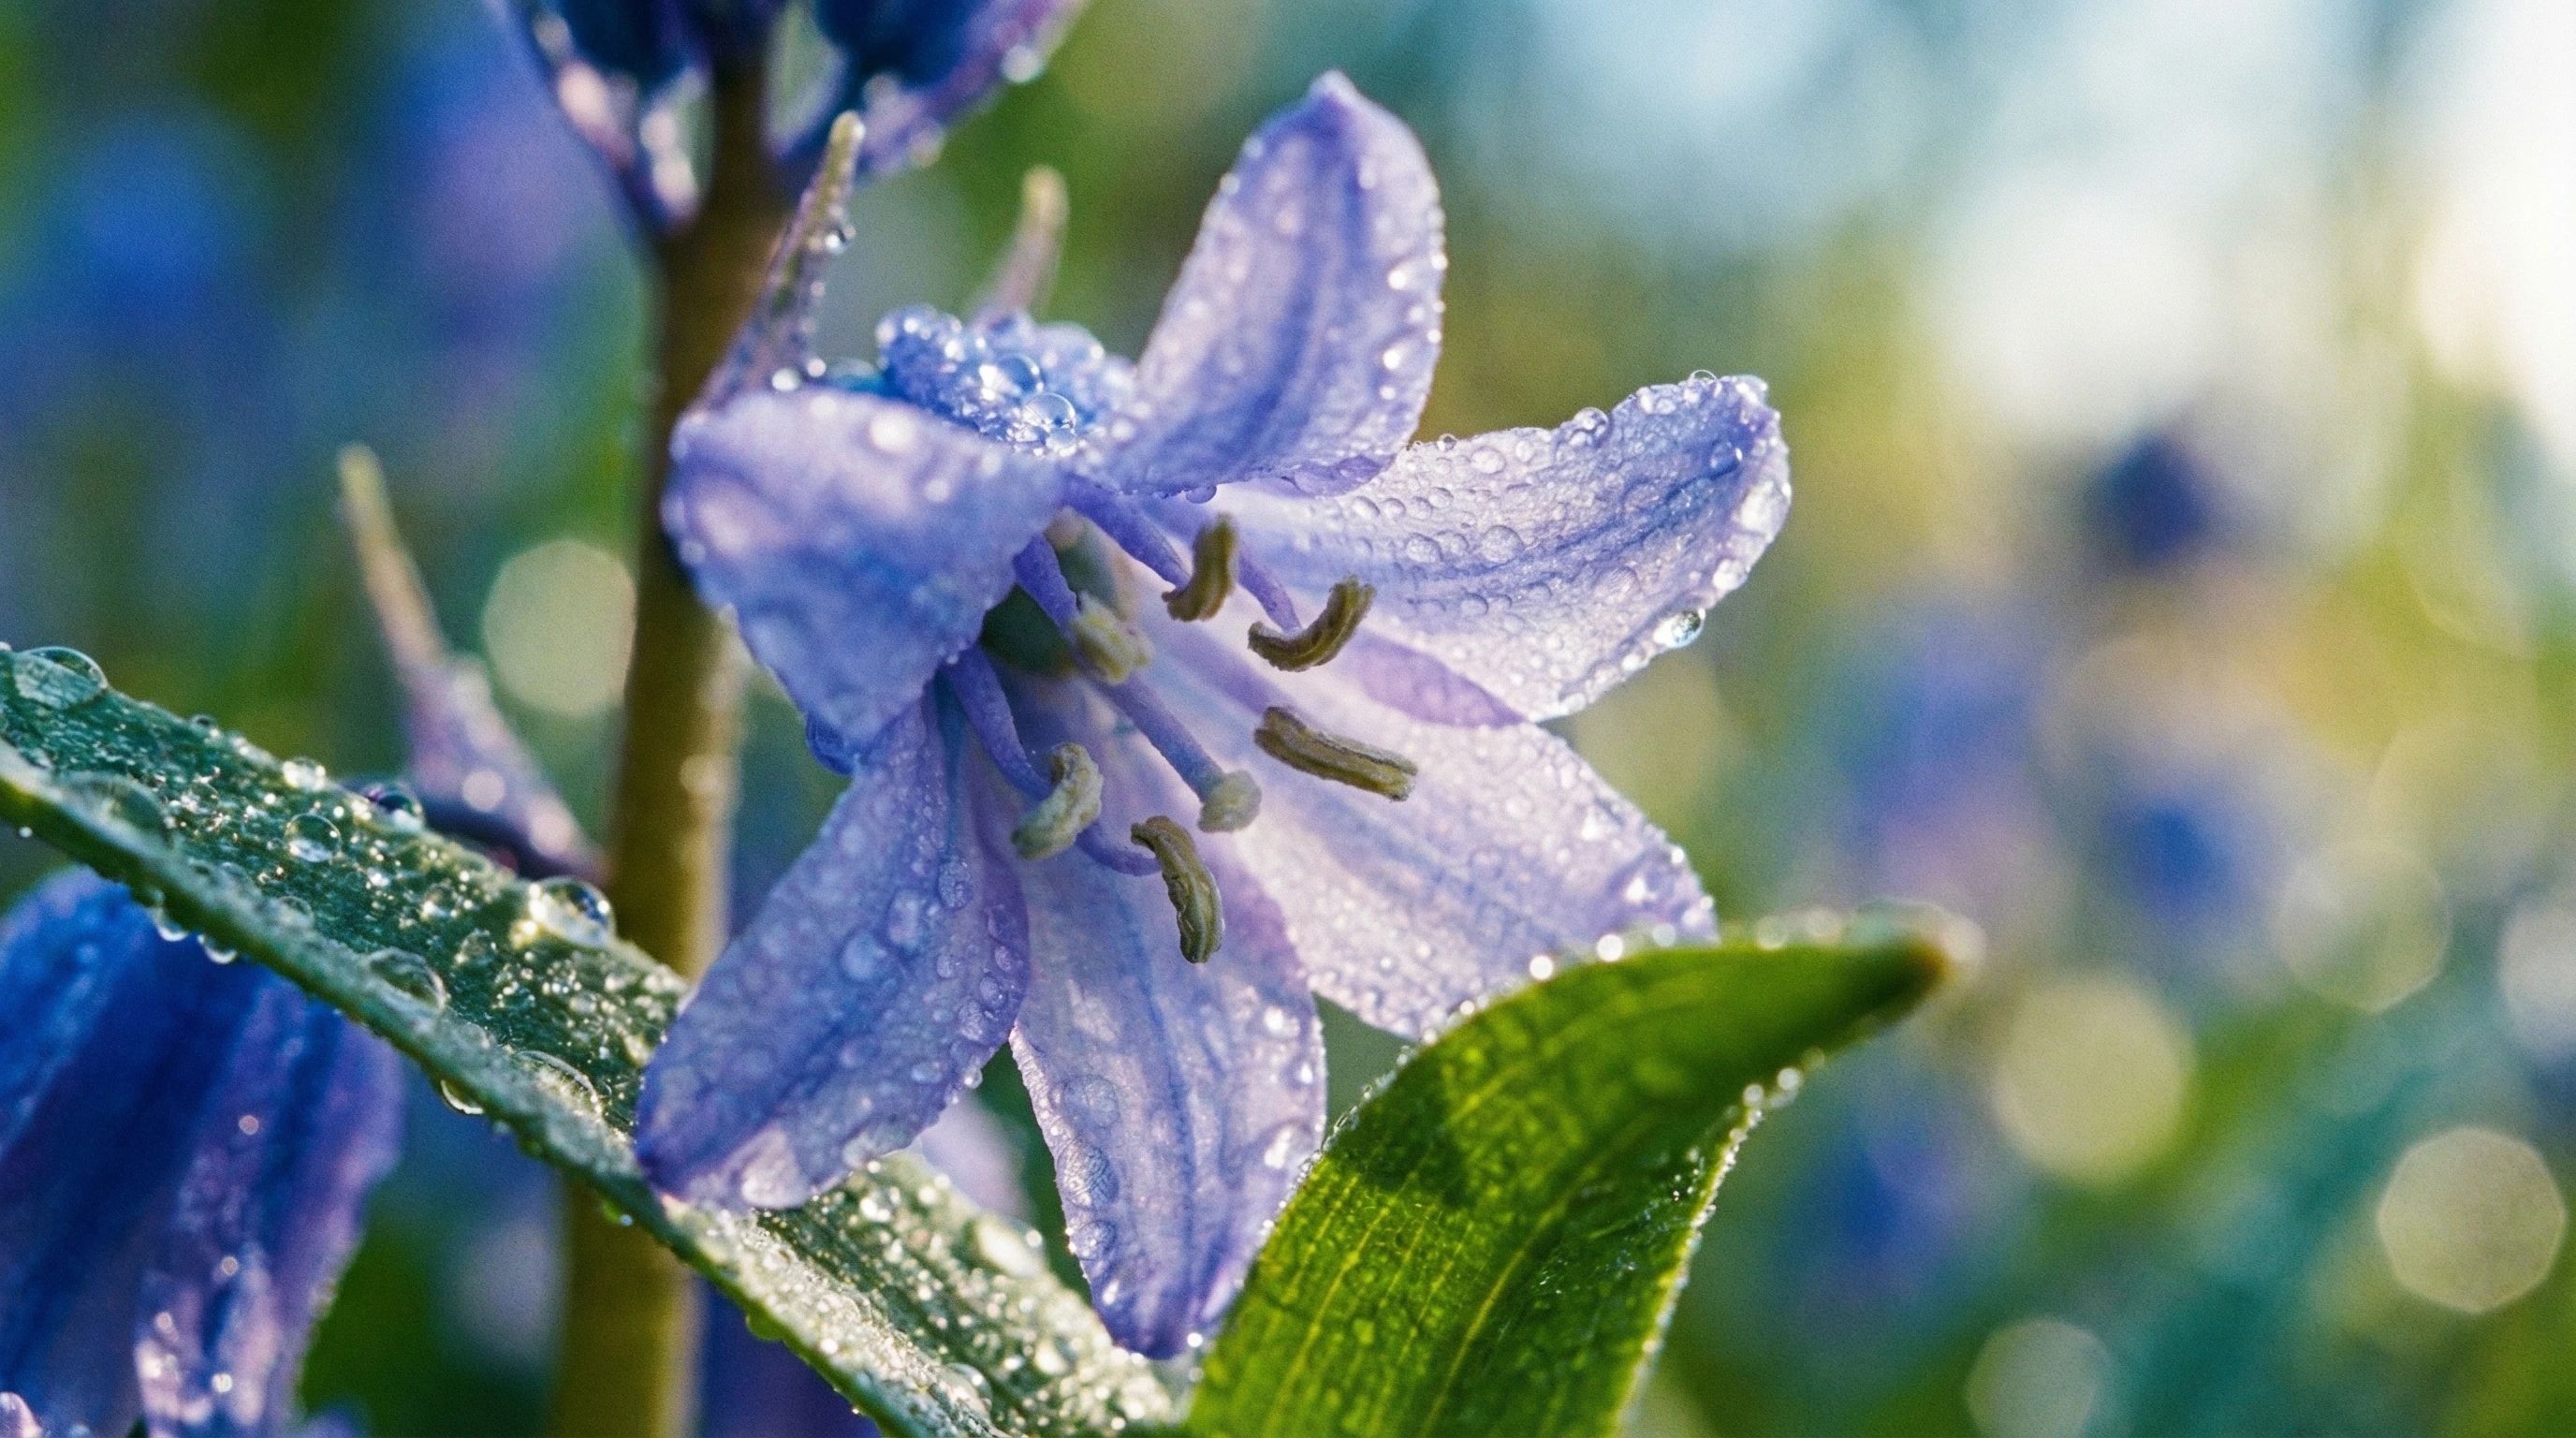
Manual focus is a big deal in macro work because autofocus just isn’t always reliable when you’re inches away from your subject. At such close distances, the depth of field, meaning what’s in focus and what’s not, gets so thin that even the slightest movement can switch up your focal point. Focusing manually gives you more control over exactly which details stand out in your shot. This means you won’t miss tiny features, such as insect eyes or texture on a petal, that can easily get lost if the camera decides to focus somewhere else.

Getting Familiar With Your Macro Gear
Picking the right gear for manual focus makes things easier and improves your results. Macro lenses are the obvious choice since they’re built for shooting up close and have focus rings designed for smooth and precise adjustments. Most macro lenses offer a long focus throw, allowing you to make fine-tuned adjustments without big jumps in sharpness.
Your camera body and settings matter too. Check out these handy features and tips:
- Focus Peaking: This tool highlights sharp areas on your screen, helping you spot exactly what’s in focus while you adjust the lens.
- Live View: Using your rear LCD with magnification helps you see the tiniest details and double-check your focus.
- Tripod: Macro shots are sensitive to movement. A sturdy tripod keeps your camera still, making it easier to lock in your focus.
- Remote Shutter or Timer: Even pressing the shutter can blur a shot, so triggering your camera remotely or on a timer helps keep everything crisp.

Step-by-Step Manual Focus Techniques for Macro Photography
The key to consistent manual focus success is a slow and methodical approach. Here is my step-by-step process to get beautifully sharp macro photos:
- Secure Your Camera: Set your camera up on a tripod and compose your shot.
- Switch to Live View: Activate your camera’s LCD screen for a clearer view of your subject.
- Magnify Your Focus Area: Use the magnification feature to zoom in (often 5x or 10x) on the small details you want in sharp focus, like a beetle’s eye or a droplet on a petal.
- Adjust Focus Slowly: Turn the focus ring gently, watching as details come into or out of sharpness in real time. Focus peaking, if available, will guide you by highlighting sharp edges.
- Take Test Shots: Snap a photo and review it on your camera’s LCD. Zoom in to check for sharpness and make small adjustments as needed.
- Lock It Down: Once you’re happy with your focus, use a remote shutter or the self-timer to minimize camera shake when you take the final photo.
Handling Depth of Field Challenges
One of the biggest challenges in macro photography is dealing with depth of field, or the area in focus. At high magnifications, it’s extremely thin. Even if your subject looks sharp to your eye, a small movement or bump can knock things out of focus. Here’s how I approach this:
- Set a Narrower Aperture: Using a higher f-stop (like f/8 to f/16) gives more depth of field. However, this can reduce available light and add some softness. I try out a few aperture settings and review my results to find the right balance for every shot.
- Focus Stacking: When depth of field is too narrow for a single shot, I capture a series of images with different focus points and blend them in post-processing. This is a solid trick for getting sharpness across your entire subject, front to back.
- Watch for Movement: Outdoors, wind and moving subjects can make precise focus tough. I use windbreaks, shoot when conditions are calmer, and sometimes bring small clamps or supports to help steady things.
An extra tip: try to shoot with a bit more distance from your subject if you keep missing focus by a hair. This can give a slightly wider depth of field and often delivers cleaner results, especially when you crop the final photo for a tight frame.
Common Challenges and How to Fix Them
Manual focus in macro photography isn’t always a walk in the park. Here are a few hassles I often run into, along with practical fixes:
- Camera Shake: Stabilize with a tripod and use a remote shutter or timer. Even the tiniest movement can ruin focus because you’re working so close.
- Mistaken Focal Points: With a shallow depth of field, your eye might be tricked by the LCD display. I use magnified view for extra inspection and, if it’s a critical shot, take a short burst of photos while nudging the focus ever so slightly with each shot.
- Working With Live Subjects: Insects and critters are rarely still. I keep my finger ready on continuous shooting, stay pre-focused on likely spots, and work quickly, making small focus tweaks as the subject switches position.
Adapting to Changing Light
Macro photography often takes place in natural light, and conditions can mix it up quickly. Bright sun produces harsh shadows, while clouds give a softer look. For manual focus work, I use a ring light or a compact LED to pump up light on my subject and make focusing easier. A reflector can also bounce light exactly where you need it, making fine detail work more straightforward.
Focusing Rails: When Precision Is Everything
Sometimes, the best way to fine-tune focus is by moving the camera itself, not the lens. A focusing rail mounts between your camera and tripod, allowing ultra-precise movement in tiny increments. This tool is especially helpful for extreme close-ups or focus stacking, where every sliver of sharpness makes a difference.

Quick Reference Guide: Manual Focus Tips for Macro
Here’s a fast checklist to keep handy for sharp macro shots:
- Select manual focus mode on your camera or lens.
- Use a tripod and remote shutter or timer to reduce shake.
- Switch to live view and magnify your focus target for accuracy.
- Take a test shot and zoom in to check focus.
- Review sharpness and make adjustments if needed.
- Try focus stacking for subjects that need extra depth.
- Shoot during stable weather or indoors for less movement.
Real-World Uses for Manual Focus Macro Techniques
Manual focus is a real game changer across many types of macro subjects—tiny flowers, bugs, food textures, or jewelry and watches. Getting that pinpoint focus can mean the difference between a so-so photo and an eye-catching masterpiece. If you want to sell prints or wow clients, finely focused details help your work stand out.
- Nature Photography: Capturing tiny insects, dew drops, or moss textures takes accuracy. Manual focus lets you shine a light on just the right area of the scene.
- Product Photos: Watches, coins, and jewelry really pop when details are sharp. Setting focus manually lets you show off engraving or stone cuts with clarity.
- Scientific and Educational Work: Botanists and entomologists often depend on manual focus to capture specimens in super detailed fashion for research or publication.
Other uses? Photographers shooting stamps, electronics, or any mini subjects for online sales or documentation will benefit from dialing in manual focus. With a bit of practice, you can also capture fun creative shots at home—even the textured skin of fruit or everyday objects reveals a new world under a macro lens.

Frequently Asked Questions
Here are some common questions I get from photographers wanting to take their manual focus macro game up a notch:
Question: What’s the easiest way to start with manual focus in macro photography?
Answer: Start indoors with still objects and plenty of light. Use your camera’s live view and magnification for the most control, and take lots of test shots to see how small focus adjustments change your results. Almost any steady surface can serve as a tripod in a pinch.
Question: Is focus stacking hard to learn?
Answer: It sounds complicated but is actually pretty straightforward. Most cameras let you take a handful of shots in quick succession, each at a slightly different focus point. Programs like Helicon Focus or Photoshop will blend these together automatically.
Question: Can I use manual focus on nonmacro lenses?
Answer: Absolutely. While true macro lenses are best, extension tubes or closeup filters allow regular lenses to shoot up close. Manual focus still gives you greater control over where sharpness lands.
Question: How can I make sure my macro shots are sharp every time?
Answer: Always double-check with magnified view after taking a photo, and bracket your focus by taking several shots at slightly different focus settings. The sharpest shot will always stand out during review.
Key Gear for Better Manual Focus Macro Shots
The right gear helps you nail manual focus for macro photography. Here’s what I recommend:
- Dedicated Macro Lens: Look for lenses with a long and smooth focus ring for precise changes.
- Tripod and Focusing Rail: Pair a solid tripod with a focusing rail for the ultimate in stability and precision.
- Remote Shutter Release: Prevents camera shake and keeps your photos sharp.
- Extra Lighting: A compact ring light or LED panel brightens subjects and helps you see focus points more clearly, especially indoors or in shadowy areas.
At the end of the day, practice is the real secret to honing your manual focus skills. Don’t be afraid to experiment with different settings, lighting, and techniques until you get the results you’re after. Photography forums and tutorial videos are great for picking up new ideas and seeing what works for others—check in regularly and contribute your own experiences, too.
By taking the time to work on manual focus techniques and getting comfort with your gear, you’ll bring your macro photography up a notch. The smallest subjects deserve big attention, and mastering this skill makes your tiny worlds crystal clear.