Mastering natural light portrait photography lets me create dramatic, authentic, and expressive images without expensive studio gear or artificial lighting. Natural light gives portraits a soft, flattering look and can be adapted to just about any environment, from city streets to spacious parks. Learning how to work with available sunlight brings a creative edge and flexibility to my photos. In this guide, I’m sharing my top tips to help you gain confidence and skill in natural light portrait photography techniques.
Understanding Natural Light for Portrait Photography
Getting comfortable with natural light is one of the most important steps when working outdoors or in spaces without artificial lighting. The quality, direction, and color of natural light can all change the look of a portrait. The time of day, weather, and location matter a lot when it comes to how light hits my subject and the background.
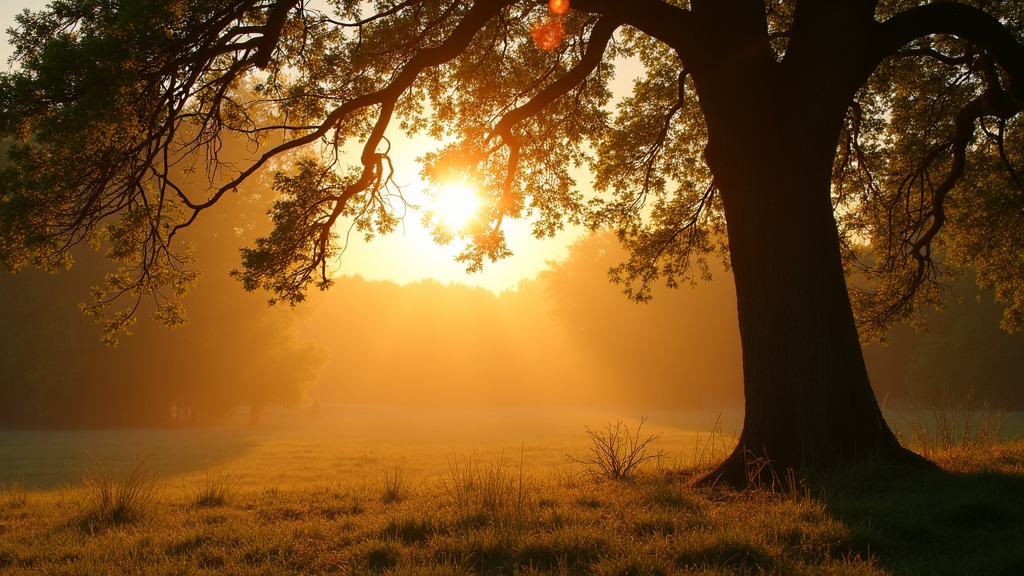
Golden hour—the hour right after sunrise and the hour before sunset—is known for providing soft, warm, and diffused light. I often shoot during these times because the low sun creates flattering shadows, even skin tones, and a gentle glow. Cloudy or overcast days are great too since they provide even light, avoiding harsh contrasts. Midday sunlight is brighter and a bit harsher but can still work if I look for open shade or adjust how my subject faces the sun.
Getting Started With Natural Light Portraits
When I’m starting out, I like to keep things simple and focus on the direction of natural light and how it falls on my subject’s face. Areas with soft, indirect sunlight or open shade—like the side of a building, under a tree, or near a window—are great places to begin. Here are some basics I always keep in mind:
- Watch the Sun’s Angle: Light coming from the side, from above, or behind the subject creates different effects. Sidelight adds depth, backlight gives photos a dreamy look, and front lighting is even and clear.
- Use Natural Reflectors: I put surfaces like white walls, sidewalks, or even a plain sheet of paper to work, bouncing sunlight to fill in shadows.
- Position Your Subject Carefully: Moving my subject just a step or two makes a difference in how light wraps around their features, especially their eyes and cheekbones.
Quick Steps For Improving Your Natural Light Portraits
With practice, I’ve built a process that helps me get reliable results every session. Here are easy steps to follow for better portraits with natural light:
- Scout For Good Light: I walk around, checking for soft, steady natural light. Looking at my own hand or the shadows on the ground helps me spot where the light is best.
- Choose a Simple Background: I pick backgrounds that aren’t distracting and where light gently highlights my subject.
- Control Exposure: Adjusting my camera’s settings (aperture, ISO, shutter speed) for the available light is key. I use the camera’s exposure meter to avoid harsh highlights or deep shadows.
- Give Posing Guidance: I ask my subjects to turn slightly toward the available natural light, so the light brings out their best features.
- Take Multiple Shots: I snap a few photos with small changes in pose or angle, closely watching how natural light hits the face.
Essential Gear for Natural Light Portraits
You don’t need a lot of fancy equipment for portrait photography using natural light, but some tools do help. Here’s what’s in my simple kit:
- Camera With Manual Controls: A camera where I can adjust ISO, aperture, and shutter speed gives extra control out in variable conditions.
- Prime Lens: Lenses with wide apertures, like a 50mm f/1.8 or 85mm f/1.8, let in more light and give portraits that beautiful blurred background.
- Reflector: Foldable reflectors are light and easy to carry, and bouncing light onto my subject helps with shadows.
- Lens Hood: This cuts down on lens flare, making portrait contrast look better even on bright days.
- Tripod: Useful if I’m shooting in low light or with slower shutter speeds.
Common Challenges And How To Handle Them
Naturally lit portraits aren’t always predictable. Weather, time, and surroundings all play a part. Here is how I deal with the most common natural light issues:
Harsh Midday Sun
Photographing at noon often leads to deep shadows and blown highlights. If I have to shoot then, I search for open shade—under a tree or near a building. Keeping my subject in the shade and the background lit can help create a well-balanced photo. In wide-open areas, a small handheld reflector helps bounce light onto the face for a softer, more flattering look.
Dull or Overcast Light
An overcast sky works like a huge softbox, giving even light with no harsh shadows. While the result is always flattering, it can look a bit flat. To add depth, I ask my subject to turn slightly toward the brightest spot in the sky or use a reflector to add a gentle highlight to the face.
Unwanted Color Casts
When light reflects off grass, red brick, or bright colored walls, it can tint skin tones. Paying attention to my subject’s surroundings helps. If the skin looks too green or blue, I stand them in a more neutral spot, adjust white balance in-camera, or fix it later while editing.
Eye Squinting
Bright sunlight makes most people squint. To avoid this, I direct my subject to face away from the sun or ask them to move into the shade. This keeps their expressions natural and relaxed. Sometimes, making jokes or letting them close their eyes before a shot helps, too.
Advanced Tips To Improve Natural Light Portraits
As my skills improved, I stumbled upon tricks that really take portraits to the next level. Here’s what I recommend for anyone looking to move beyond basics:
Check out Backlighting: Putting the sun behind my subject often adds a gorgeous rim of light around hair and shoulders. To stop the face from looking too dark, I use a reflector or bump up my camera exposure, letting the background go a little brighter if it needs to.
Experiment with Window Light: Indoors, windows work as natural light sources. I get my subject to face or angle toward the window for soft, wraparound lighting. If the sun is harsh, sheer curtains work as simple diffusers.
Use Natural Elements: I sometimes place my subject near leaves, flowers, or interesting objects that let light filter through, breaking up the light and casting fun shadows for an artistic touch.
Control Depth of Field: Using wide apertures (like f/2.8 or lower) lets me blur out distracting backgrounds and make my subject pop, even in busy places.
Edit With Care: I use tools like Lightroom, Photoshop, or Snapseed to fine-tune exposure and colors. I keep things subtle—just enough to keep skin tones looking true to life without making it obvious I did lots of editing.
Why Choosing The Right Light Source Matters
The type and direction of sunlight affect the mood of every portrait. Warm light during morning and evening adds a golden, cozy feel. Window light indoors can be bright but has a gentler, softer touch. Placing my subject in the most flattering light always counts more than my gear or background. Trusting my eyes and making light the priority makes each photo session special.
- Golden Hour: Makes skin tones soft and warm, perfect for romantic or dreamy portraits.
- Open Shade: Reliable and gentle, helps me avoid harsh shadows on the face even during midday.
- Backlighting: Puts a next-level cool rim light around hair and shoulders, showing off dramatic silhouettes.
- Window Light: Lets me shoot great natural portraits indoors whatever the weather.
Frequently Asked Questions
Natural light portraits often spark questions about techniques and gear. Here are a few I get a lot and my best answers:
How do I choose the best location for natural light portraits?
Answer: I always look for places with soft, indirect sunlight or spots of open shade. I keep the background simple so it doesn’t distract. Parks, gardens, and scenic areas by big windows are always a good bet.
What camera settings are best for outdoor portraits?
Answer: Most often, I use a wide aperture (like f/2.0 to f/4.0) to blur the background. I keep ISO low to avoid extra noise, and I want my shutter speed fast enough to stop blur—usually at least 1/200th of a second, more if it’s really bright or my subject is moving.
How can I work with changing light conditions?
Answer: I keep a close eye on how the sun moves, how clouds pass, and how shadows change, sometimes during a single shoot. I’m quick to adjust my position and settings, and I always keep a reflector or a small diffuser nearby just in case.
Wrapping Up
Growing as a natural light portrait photographer has opened up my creativity and let me connect better with my subjects. Paying attention to the type of light, working in basic locations, and making the most of whatever conditions I have lets me create portraits that feel real and expressive—often with just a camera, lens, and reflector. Practice, trying new things, and not worrying about mistakes all help me get better. With time, using natural light feels easier, and every new portrait session turns into a chance to try something fresh and create inspiring results.