If you’re into landscape photography, capturing a waterfall’s motion blur using long exposure is one of those techniques that never loses its magic. The silky flow of water can turn a simple nature scene into something way more dramatic and eye-catching. I’ve spent a lot of time trekking to different falls with my camera bag, so I want to share tips that can help make your waterfall images look super smooth and professional.
Why Go for Motion Blur in Waterfall Photography?
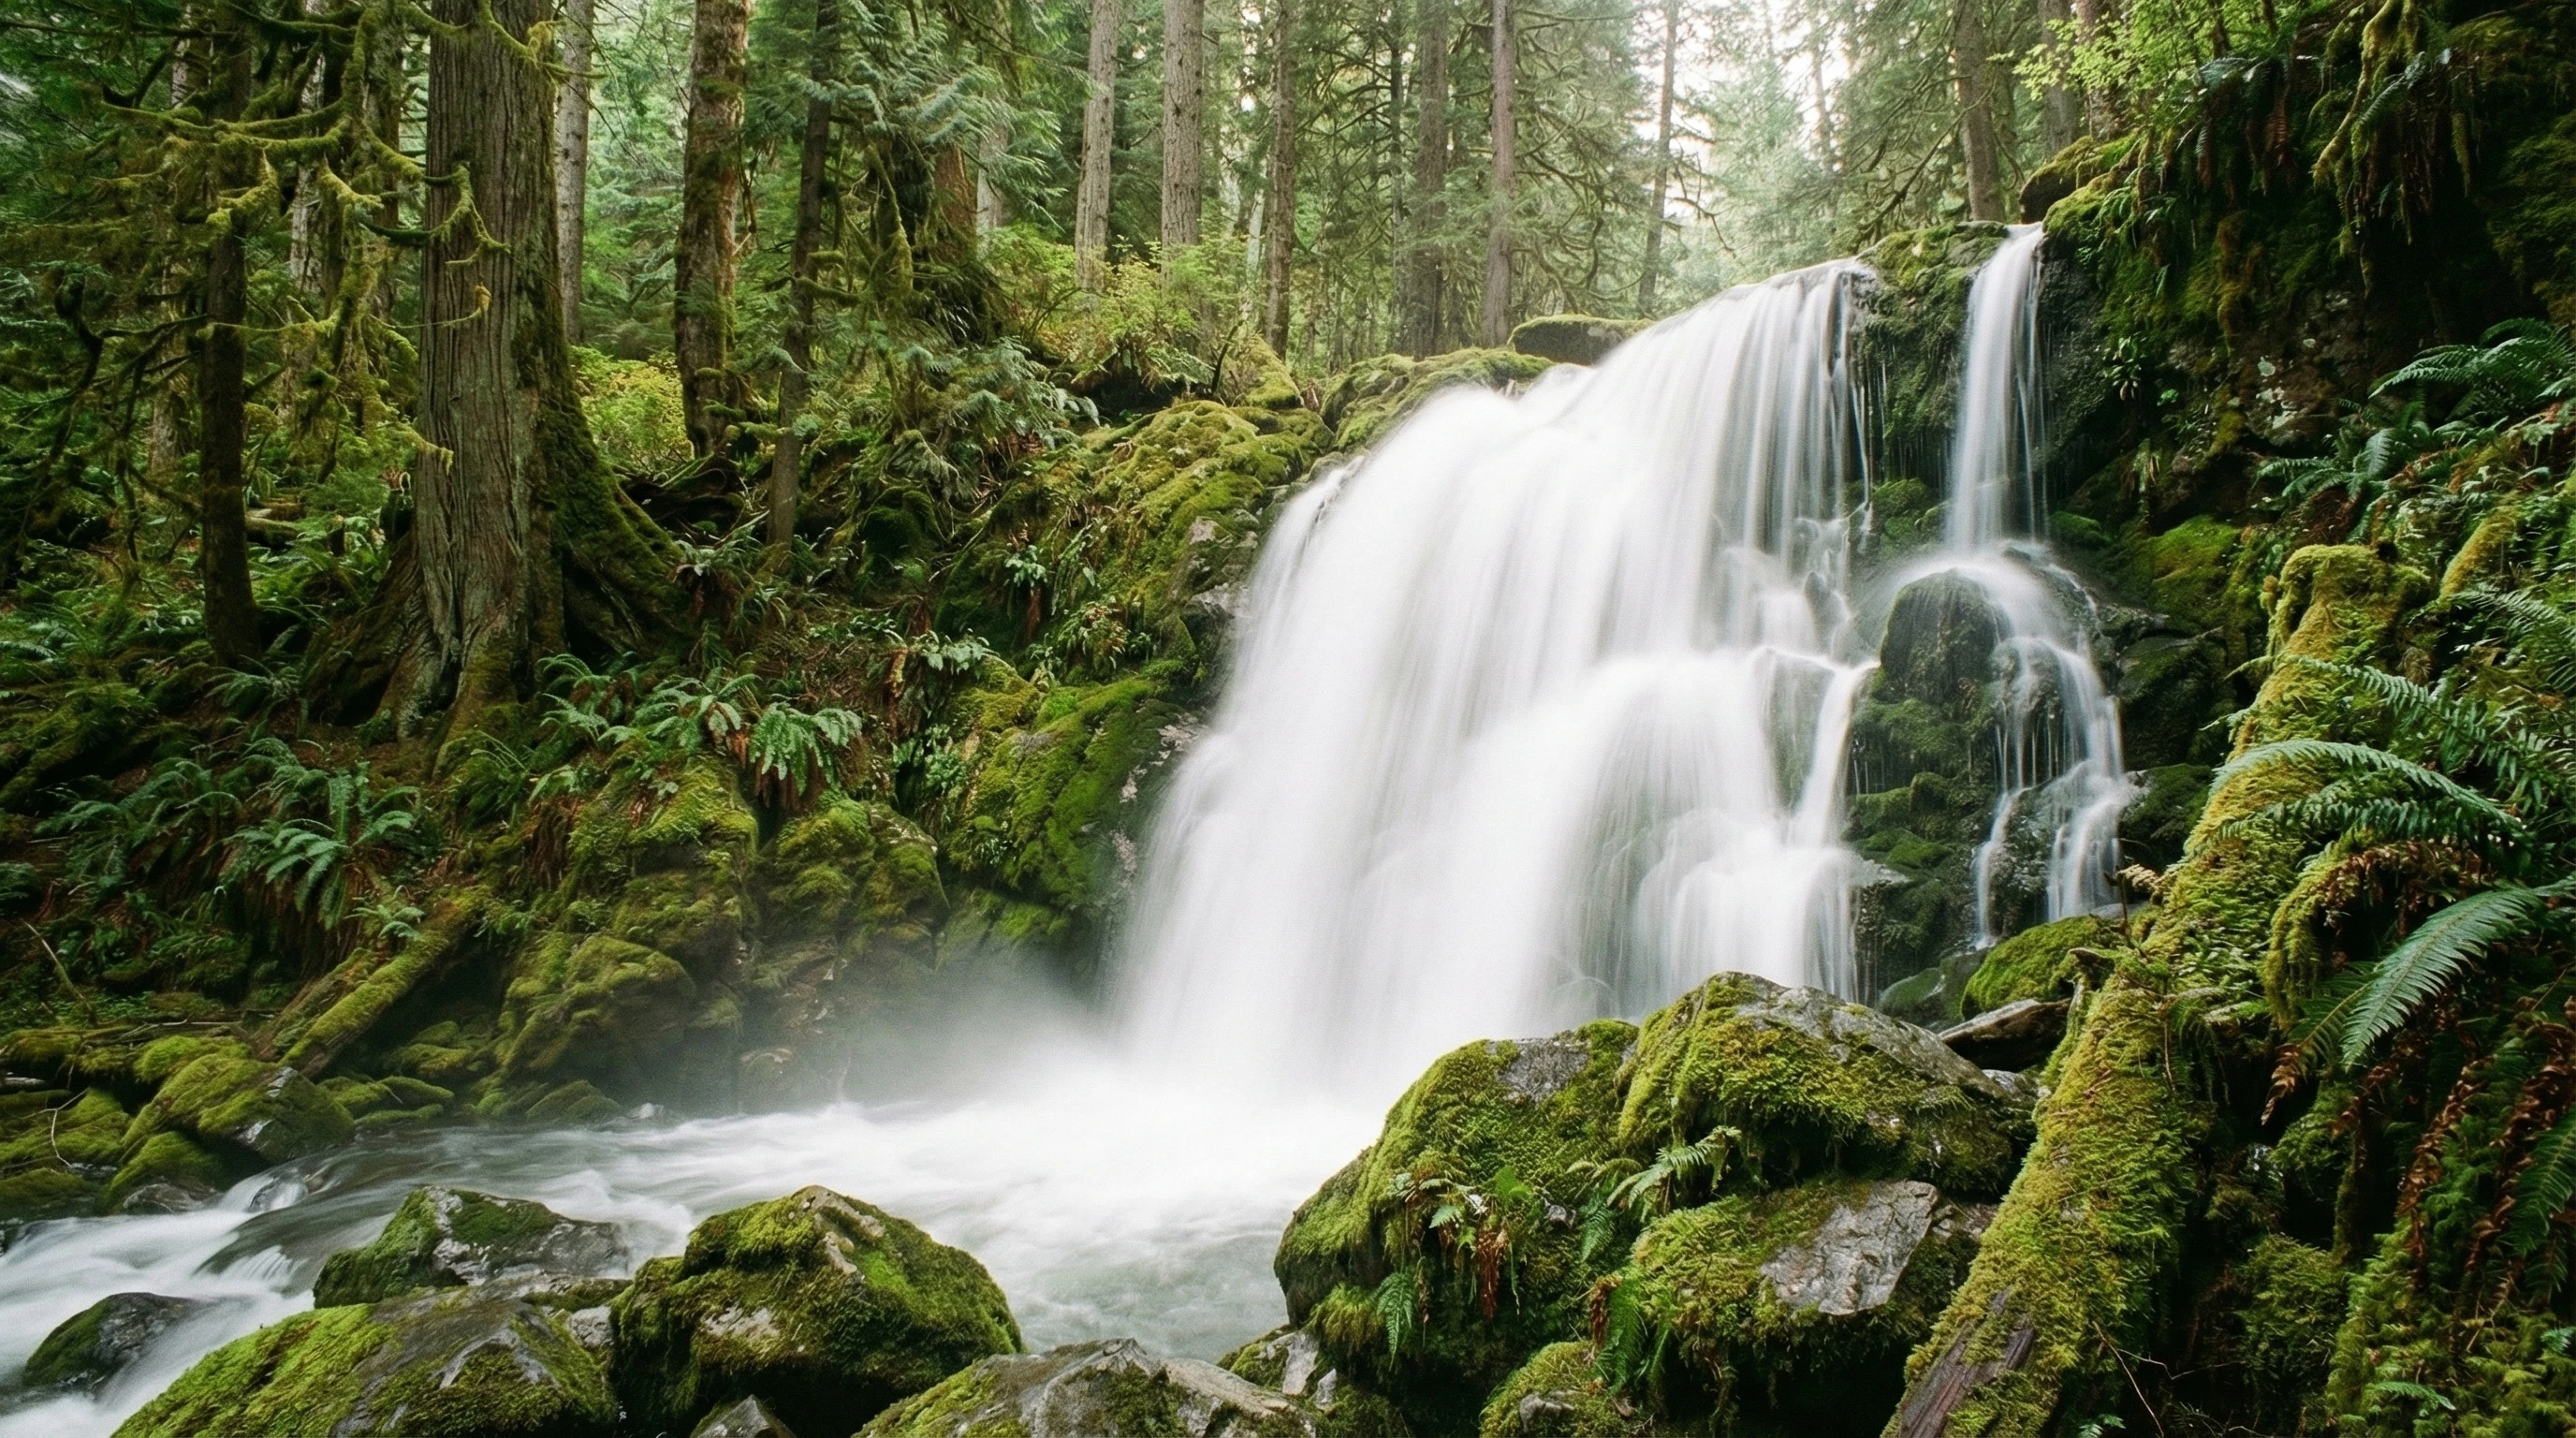
Photographing waterfalls with a bit of motion blur is all about capturing that peaceful, flowing feeling you get when watching water twist and tumble over rocks. It’s not just freezing a moment; it’s about showing a sense of movement and atmosphere in your shot. When you nail this effect, your images have a dreamy, almost painting-like vibe.
Long exposure waterfall shots are pretty popular among nature photographers because they draw viewers right into the scene. If you’re after that wow factor to set your landscapes apart, this is a technique worth learning. Plus, once you know how to control your camera settings and choose the right conditions, it gets easier every time. It’s also a great way to show off even familiar locations in a new light. Mixing in some motion blur adds a unique element to your collection, making your work pop among other landscape images.
What Gear Do You Need for Waterfall Long Exposure?
Waterfall long exposures don’t require the most expensive camera gear, but some basics are really important for making things easy and reliable. Here’s what I bring on every shoot:
- Camera with Manual Controls: Most DSLRs and mirrorless cameras work perfectly. Manual control over shutter speed is the key here.
- Tripod: A sturdy tripod keeps your camera totally still during those long exposures, which is super important to avoid blurry backgrounds. Make sure it’s stable, especially if you’re on rocks or wet ground.
- Neutral Density (ND) Filter: ND filters cut down the amount of light entering your lens, letting you run longer shutter speeds even in broad daylight.
- Remote Shutter or Timer: Using a remote or your camera’s timer helps prevent any jostling that could wreck your shot. This is especially useful for exposures longer than one second.
- Microfiber Cloths and Lens Hood: Water droplets and spray are always a concern. Keeping your lens clean is surprisingly important in waterfall environments. Bring more than one cloth, as they can quickly get soaked.
If you’re just getting started, picking up a basic set of ND filters and a good tripod can make a noticeable difference. I’ve had plenty of times where a wobbly tripod or cheap filter gave me headaches when looking at the final shots. Try to invest in quality gear, especially when it comes to filters and supports, because they affect the sharpness and clarity of your images.
The Basics: Key Camera Settings for Waterfall Motion Blur
Locking in the right camera settings is what really makes or breaks motion-blur waterfall photos. A few adjustments can take an average shot to something you’re proud to show off.
- Shutter Speed: Go for slower shutter speeds (anywhere from 1/2 second to several seconds). The exact speed depends on how fast the water is moving and how much blur you want. Typical sweet spots for many falls are 1-2 seconds.
- Aperture: I usually stick with f/8 to f/16. Keeping it around f/11 gives sharpness across your scene without closing down too much and running into diffraction issues.
- ISO: Keep your ISO at the lowest native setting (usually 100 or 200) to avoid grain and keep things clean. Lower ISO also lets you open up those shutter times even longer.
With these settings, you’re set up to get that perfect creamy water look. One tip that’s saved me time: always double-check your shots at full zoom to spot any shaking or focus issues right away, instead of finding out later at home. Remember, experimenting with your settings on location can help you find unique looks, so don’t be afraid to take a few extra test shots before committing to your final image.
How to Pick the Best Conditions and Locations
Not every waterfall scene gives you the same results, but there are a few things I keep in mind for the best outcome:
- Overcast Days: Cloudy skies naturally diffuse the sunlight, which keeps highlights from blowing out in your long exposures. If it’s a bright, bluebird day, an ND filter is even more important. Overcast conditions are a photographer’s friend for waterfall shots because the light wraps around details and colors pop more.
- Go Early or Late: Sunrise and sunset often bring softer light, less harsh shadow, and sometimes great color. Plus, popular waterfalls are less crowded at these times. Golden hour warmth can add a nice touch to your scene as well.
- Scout for Angles: Each waterfall looks different depending on where you shoot from. Try different perspectives—from above, at the base, or off to one side—to find what looks best with the flow and rock formations.
- Watch for Spray and Mist: Getting up close is tempting, but spray on the lens can ruin long exposures quickly. Using a lens hood and standing where the wind isn’t blowing directly at you goes a long way.
A little bit of planning and patience with both time of day and weather usually pays off with more keepers in the end. Revisiting locations during different seasons can also offer a variety of looks, as water volume and foliage change throughout the year. Don’t be afraid to return to the same spot and see how conditions evolve.
Common Issues and How to Fix Them
You’ll probably run into some typical hurdles when shooting waterfalls with long exposures. Here’s how I deal with the most common ones:
Problem: Blurry Rocks or Trees
If you’re seeing background blur, it’s usually either wind shaking your gear or camera movement when triggering the shutter. Try these quick fixes:
- Make sure your tripod legs are really planted, ideally on solid ground or wedged between rocks.
- Hang your camera bag from the tripod center for extra stability if it’s windy.
- Always use a remote release or the self-timer to avoid touching the camera directly.
Problem: Washed-Out Highlights
Water in direct sunlight can come out just a bright blob. Using an ND filter helps, but it also helps to check your histogram often to avoid clipping. If you still get blown highlights, aim for times with less harsh light, or bracket exposures and blend later. Adjusting your angle or timing can also prevent hot spots from dominating your composition.
Problem: Lens Drops and Fog
Moisture in waterfall zones is real. I keep extra microfiber cloths in my pocket, and I wipe the lens regularly, especially after every few shots. Keeping your gear out of the main spray when possible saves a lot of headaches. If you do get foggy glass, gently wipe in a circular motion and give your equipment a minute to adjust to outdoor temperatures.
Bonus Tips to Make Waterfall Photos Pop
Once you’ve got the basics down, these tweaks help your waterfall images stand out even more:
- Try a Polarizing Filter: It’s not just for blue skies. Polarizers cut through reflections on wet rocks and leaves, making colors look richer and helping your scene stand out.
- Go Wide (or Zoom In): Wide lenses grab the full scene and foreground, but sometimes zooming in on an interesting section of the waterfall or a pool gives you a more dramatic image. Both approaches have their own impact, so try mixing it up based on the story you want your photo to tell.
- Include Foreground: Rocks, moss, or even fallen branches in front of the waterfall add depth and lead the viewer’s eye into the shot. I like using small boulders as a frame, which can help give context to the waterfall’s size and put your viewer into the scene.
- Blend Shutter Speeds: If you want the water to feel silky while the rest of the landscape stays sharp, you can blend a sharp image for the rocks and a long exposure just for the flow in post-processing. Learning simple blending techniques in editing software lets you have the best of both worlds—sharp foregrounds and creamy water.
Where Waterfall Motion Blur Really Works
You don’t have to hike for miles to make this work. I’ve used these tips both at huge waterfalls in national parks and little roadside streams. The cool thing is, even a small drop or cascading creek can look amazing with a long exposure.
- Landscape Prints: Creamy waterfall images look awesome as wall art or gifts, adding a relaxing vibe to any space.
- Nature Portfolios: If you’re building a collection for a website or social media, waterfall shots with motion blur get solid reactions and engagement. People love the ethereal look of silky water flowing over rocks.
- Travel Memory Books: Blurry water images set the scene for adventure, so photo books or travel stories become a lot more engaging. These shots quickly refresh memories and start conversations.
Wherever you’re shooting, using long exposure adds a professional touch without a ton of technical fuss. Just a little practice and experimentation can turn any water scene into a masterpiece for your personal or professional projects.
Frequently Asked Questions
I get a lot of questions when people see my waterfall shots, so here are some quick answers to common stuff you might be wondering about:
Question: How long should I set the shutter speed for good motion blur?
Answer: Most of the time, start between 1/2 second and 2 seconds. Adjust up or down depending on how strong the flow is and the effect you like. Faster water might need quicker speeds to keep some texture, while slowmoving falls usually look best with longer exposures.
Question: Do I always need an ND filter?
Answer: During bright daylight, using an ND filter helps slow your shutter speed enough for the blur. Early or late in the day, you might get away without one, but a filter is handy to have most of the time.
Question: What’s the best way to avoid getting water droplets on the lens?
Answer: Stand out of the main spray as much as possible, use a lens hood, and wipe the lens before each new shot. Sometimes moving just a few feet can help keep the front element dry for longer. Angle your lens away from the wind when possible to reduce the chance of droplets finding their way onto your glass.
Question: Should I shoot in RAW or JPEG?
Answer: Shooting in RAW gives you a lot more flexibility to adjust exposure, highlights, and shadows during editing, which really comes in handy for waterfall scenes. RAW files store more information, making it easier to recover both bright and dark areas in your final image.
Final Thoughts
There’s a lot to learn with long exposure photography, but it’s also really rewarding once you get comfortable. Waterfall motion blur isn’t only about camera tricks—it’s about slowing down and paying attention to light, weather, and the feeling of a place. A bit of practice, the right gear, and patience can turn an everyday waterfall visit into a shot you’ll be proud of. Let me know how your next waterfall adventure goes or any gear you’ve loved for these types of photos! Feel free to share your favorite tips as you keep shooting; learning from each other always sparks new ideas and improvements.