Stop motion light painting abstract motion portraits pull you into a world where photography, painting, and animation all meet in dreamy and unpredictable ways. If you’re curious about crafting portraits that ooze with color, energy, and personality—all made with just a camera and some lights—you’re in the right place. I’m jumping into what gear you’ll need, the basic techniques, and some real-world advice to help you get great results, even if you’re just starting out.
What Makes Stop Motion Light Painting Portraits Unique?
There’s nothing quite like seeing a portrait come to life with a swirl of glowing trails, neon lines, and bursts of abstract motion. Stop motion light painting portraits mix long exposure photography and frame-by-frame animation to create images that are both dynamic and layered. Instead of capturing just a still moment, you’re recording a series of hand-drawn light movements to give your subject a one of a kind energy.
This style first popped up with early experimental photographers in the 20th century but really took off as affordable cameras and LED tools became available. Because it’s not limited to traditional photography rules, you get endless flexibility to express mood, tell a story, or just experiment with wild effects. The creative space here is pretty much limitless, and every shoot feels fresh because the light trails are unique every time you try them.
Gear List: What You Need to Get Started
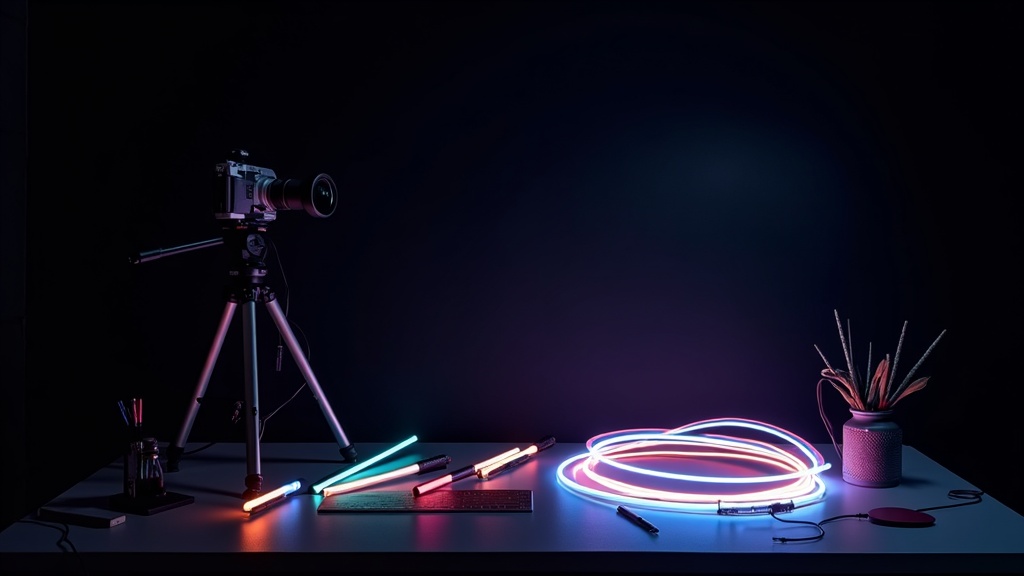
Getting into stop motion light painting abstract motion portraits doesn’t mean you need a fully decked out studio or super pricey camera. But having some basics sorted will help you control your results. Here’s a handy checklist:
- Camera with Manual Controls: You’ll want manual exposure and focus. Even entrylevel DSLRs or mirrorless cameras work great.
- Tripod: Super important for keeping every frame steady and consistent.
- Remote Shutter Release: Helps avoid touching the camera and shaking the shot. Wired or wireless remotes both work.
- LED Light Sources: Light wands, LED pens, fiber optic brushes, or even your phone flashlight all add their own twist. Colored gels or cellophane taped over lights can be an easy way to switch up your palette.
- Black or Dark Backdrop: This makes the light trails and your subject really pop. A large sheet, curtain, or even a dark wall does the job.
- Editing Software: You’ll need something for stitching the photos together into a stop motion video, like Adobe Premiere Pro, After Effects, or the free app Blender. For singleframe art, Lightroom or Photoshop helps polish the look.
If you want to try advanced effects, you can also bring in color changing LED sticks, rotating platforms (for multidirectional spins), or prisms to refract light for even more creative options. These are all optional, but they can add new dimensions and styles to your work, making each portrait truly unique.
How Stop Motion Light Painting Works
This style is all about capturing a sequence of photos with intentional light movement in each frame. Instead of shooting a video, you’re snapping one image at a time and building up a motion series. Here’s a quick step by step of how the process goes for portraits:
- Pose your subject in front of a dark background. Dress them in darker clothing if you want the light to be the main focus.
- Set up your camera on a tripod, choose a slow shutter speed (usually 1-5 seconds per frame), low ISO (to keep it clean), and medium aperture (f/8 is a solid starting point).
- Turn off the room lights so you control all the illumination. If your subject needs to be a bit brighter, use a quick burst from a flash or a soft, constant light just for the face.
- After each exposure, move your light tool around the subject or in the background. You can experiment with spirals, zigzags, or even writing words in the air!
- After every frame, either leave the subject still or have them make tiny adjustments in their pose for more motion. Repeat the process for as many frames as you want to create your sequence.
- Once done, load the images into editing software and either stitch them together for an animated effect or pick out the best frame as a standalone piece.
An extra tip: Sometimes, combining a series of light painted frames with standard action shots adds even more excitement to the animation. Try mixing in regular portraits and then jumping back to painted frames for contrast in your final project.
Practical Tips for Consistent Results
Creating abstract motion portraits can feel like controlled chaos, but there are some tricks that keep your images sharp and exciting rather than messy or accidental looking.
- Plan Out Your Light Movements: Quick sketches or notes before shooting help you remember what shapes and patterns you want to try.
- Keep the Tripod Still: Even a tiny bump throws off your sequence. I usually tape down the tripod legs if I’m shooting on a smooth floor.
- Use Markers on Your Floor: Tape marks let you know where to stand or move, so the light shapes stay consistent through the sequence.
- Limit Ambient Light: Any stray light might erase your carefully painted trails or brighten spots you don’t want. I always make sure all windows, screens, and lamps are covered or turned off.
- Patience Goes a Long Way: Sometimes you’ll need a few trial runs before the light patterns and timing line up just how you want them. It’s all part of the process.
- Experiment with Angles: Changing the angle and height of your camera can make your light paintings look completely different. Don’t be afraid to change up your viewpoint mid-shoot for a new perspective.
Common Challenges and How to Fix Them
Things don’t always go to plan when mixing slow shutter speeds and freehand lights. Here are a few hiccups I’ve run into and some practical solutions:
Unwanted Blurry Faces or Bodies
If your subject can’t hold really still, faces or hands might go soft or ghostly. I usually solve this by giving a quick flash burst at the start of the exposure, so the face freezes sharp, and then let the light painting fill in the rest of the frame.
Light Trails Too Dim or Washed Out
If the trails don’t pop, try slowing the shutter speed or using a brighter LED. If things get washed out, dial down the ISO or use a smaller aperture (higher f/number). Sometimes moving the light source closer to the lens adds brightness without flooding the whole shot with too much light.
Inconsistent Light Motion Across Frames
If the effect jumps around a lot in your final animation, I find it handy to work with a partner. One person handles the lights, while the other handles the camera and timing. Or, use those tape floor markers to keep movement predictable.
Lights Bleeding Into Each Other
Sometimes, light trails overlap in ways that blur the details. To avoid muddy colors, plan your moves so each frame focuses on one type or color of light at a time. Editing can also step up contrast and separate overlapping trails for a crisper final image.
Creative Ideas Worth Checking Out
Part of the magic is how many different looks you can get. Here are a few ideas I think are really fun, especially if you want to step beyond the basics:
- Colored Layering: Shoot multiple light effects in the same frame by resetting the lighting and re-exposing. This creates glowing halos and multicolor bursts.
- Shapes and Symbols: Write words, shapes, or even emojistyle faces with your light tools for a personal twist.
- Double Exposures: Overlay a traditional portrait with a stop motion light painted version for a blended, ethereal effect.
- Costume Integration: Use illuminated props, glowing glasses, or tape LED strips directly to clothing for a scifi vibe.
- Interactive Portraits: Invite your subject to interact with the light tools, “catching” bursts or “wearing” halos drawn during the shoot.
- Background Transformations: Try swirling patterns behind your subject to create the sense of motion or energy swirling around them, making the portrait feel lively even when the person is standing still.
- Light Reflection: Use reflectors or mirrors to bounce the painted light around the frame. This gives more depth and unexpected patterns that can make your image stand out.
Don’t hesitate to try drawing recognizable every day objects with your lights—hearts, stars, arrows—if you want to tell a story or set a theme. The more you experiment, the more creative results you’ll stumble upon.
Real-World Applications and Inspiration
This technique pops up in everything from music videos and modern art galleries to social media avatars and family party animations. Because the look is so instantly striking and custom, I’ve seen couples use it for splashy engagement announcements, musicians for album art, and small business owners for unique profile photos. For more pro-level results, check out artists like Eric Paré (who is all about light painting portraits) on Instagram or visit the Photopills blog for advanced tutorials and inspiration.
- Music and Fashion Shoots: Brings in movement and energy impossible to get from standard portrait photography.
- Branding and Social Media: Sets you apart instantly if you want a memorable personal or business image.
- Workshops and Art Classes: A hands on way to get people excited about both photography and creative self-expression.
- Short Films and Animation Projects: Stop motion light painting can be used to create stunning sequences or backgrounds, especially in music videos, short films, or digital art pieces, drawing viewers in with next level cool visuals.
Frequently Asked Questions
Here are answers to a few things I’ve been asked by newcomers to stop motion light painting portraits:
Question: Do I need expensive lights to start?
Answer: Not at all. Simple LED wands or even the flashlight on your phone will get you decent results. Cheap colored gels are an easy way to make things more interesting.
Question: How dark does the room need to be?
Answer: The darker, the better. Any ambient light can dilute your painted trails, so black out windows and tape over device LEDs if you can.
Question: Can I do this solo, or do I need a team?
Answer: Working with a friend helps, especially for multistep or animated sequences, but you can definitely experiment solo if you’re patient and set up your remote shutter right.
Question: What editing programs work best for stop motion light painting?
Answer: You can use Adobe Premiere Pro, After Effects, or Blender for video sequences. For single image edits, Lightroom or Photoshop are perfect for touching up colors and contrast.
Question: Are there any safety concerns?
Answer: Always be careful in a dark studio. Watch for tripping hazards like power cords and secure your light tools so nothing overheats. Keep an eye out when using highpowered LEDs or lasers.
Final Thoughts
Stop motion light painting abstract motion portraits open up creative doors that regular photography can’t touch. With just a bit of gear and some practice, you’ll be able to produce portraits that look wild, personal, and totally out of this world. Give it a try, experiment a little, and see what you can create. You might be surprised at what lights up your imagination the next time you set up the tripod and let it rip with your own glowing masterpiece.