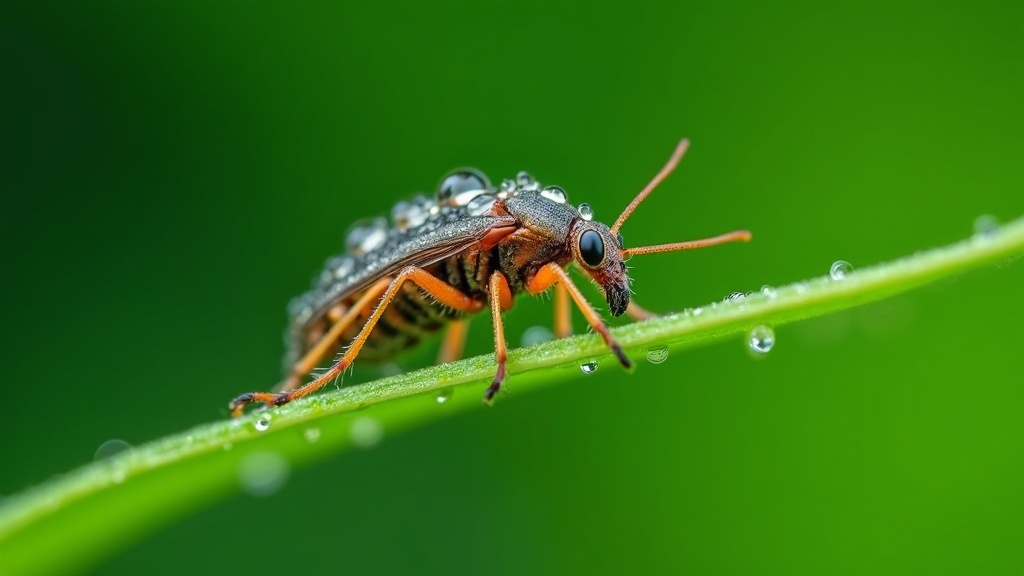
Macro photography reveals an up-close world that often goes unnoticed. When I take macro photos, small insects, flower petals, and even everyday textures transform into amazing visual stories. However, if you’ve tried this type of photography, you’ll probably notice that getting even, sharp focus throughout your close-up images can be really tough. That’s where focus stacking comes in. I want to explain each step of the process so you can make the most of your macro shots and get stunning results with sharp details from edge to edge.
What Is Macro Photography Focus Stacking?
Focus stacking is a photography technique where I take several pictures of the same subject at slightly different focus points, then blend them all together into one final image. The main goal is to produce a photo that is sharp across the entire subject, making details pop in ways a single shot usually can’t. This approach works especially well for macro photography, where the depth of field is often razor thin.
By stacking multiple photos, I overcome some limitations of my camera’s lens and sensor. Instead of having only a small part of a flower or insect in focus, I create an image where the entire subject stands out. Focus stacking gives macro images a crisp, almost three dimensional look that really draws people in. If you love showing off details others might miss, this method is worth adding to your toolkit.
Essential Equipment for Macro Focus Stacking
When I prepare for macro focus stacking, I make sure to have certain equipment that helps me get the best results. Clear, steady photos are super important because any switch in position can make the blending process trickier later on. Here’s what I use:
- Camera: A DSLR or mirrorless camera that lets me control focus and exposure settings manually.
- Macro lens: Lenses with high magnification, like a 90mm or 100mm macro lens, are great for getting fine details.
- Tripod: Keeping my camera stable is important, as even slight movements can cause alignment issues during stacking.
- Remote shutter release or camera timer: This stops camera shake during shots, especially if I have to take many images.
- Focus rail (optional): A focus rail lets me move my camera forward or backward in tiny increments, helping with accurate focus adjustments for each shot.
- Lighting: I often use a soft light source, such as a ring flash or a small LED panel, for even lighting without hard shadows.
- Focus stacking software: Programs like Helicon Focus, Zerene Stacker, or Adobe Photoshop help blend the images together smoothly.
Beyond the essentials, patience and planning are just as important. I also keep handy cleaning cloths and a blower for lenses, plus spare batteries and memory cards for longer photo sessions.
Step By Step: The Focus Stacking Workflow
Getting sharp details in macro images comes down to taking things one step at a time, staying patient, and being consistent with setup and technique. Here’s how I approach each shoot:
- Set Up the Subject
Start by choosing a clean, stationary subject, like a flower or a small object. If you’re outside, keeping wind away (using windbreaks or working indoors) stops the subject from moving between shots. I sometimes use small clamps or stands to keep delicate subjects steady. - Stabilize Your Camera
Mount your camera on a tripod. Make sure the tripod is on a solid surface. If possible, use a remote shutter release or set the 2-second timer to prevent shake. For extra firmness, I sometimes hang a weight from the tripod’s center to really lock it down. - Compose Your Shot
Frame the composition so the subject fills your photo in an interesting way. I recommend using manual focus. Select the closest point of the subject where you want the focus to start. Double check that your background isn’t distracting, as focus stacking makes both subject and background really clear. - Adjust Camera Settings
Manual mode is my go-to. Set the aperture to f/5.6 to f/8 for a mix of sharpness and minimal diffraction. Keep ISO as low as you can (like ISO 100) to avoid unnecessary noise. Make sure to lock your white balance for consistency across all shots. - Take a Series of Photos at Different Focus Points
This is the core of focus stacking. Start by focusing on the nearest detail. Take the first photo. Move the focus just a touch farther back (either manually on your lens, using a focus rail, or with your camera’s focus ring), then take the next photo. Repeat this until you’ve covered the whole subject from front to back. For subjects with a lot of depth, this might mean 10 to 30 shots or even more. If you want absolutely flawless detail, you can take as many shots as you need till every surface gets captured sharply. - Keep Lighting Consistent
If you’re using flash, make sure each shot looks the same. For natural light, avoid moving clouds if possible or shoot quickly to reduce differences between frames. I also block stray window light and check my lighting setup after every few shots. - Review Images on Your Camera
Check your shots. Make sure focus covers from front to back of the subject. Zoom in to check for any movement or blurred sections. If things look off, retake the set or adjust your process. Having a checklist of the angles you need can really help avoid re-shoots. - Transfer to Computer and Stack
After your shoot, load the images onto your computer. Naming or keeping order by capture number helps, since stacking software relies on the images being in order. It’s smart to save your original RAW files in case you want to redo the process later with different blending techniques. - Blend Images in Software
Open your stacking program and follow its instructions to load your images. Most programs do a good job with default settings, but sometimes manual retouching helps to fix slight alignment issues. Save the final image as a high-quality JPEG or TIFF. If you see weird halos or soft spots, tweak the settings or do some minor touch ups by hand.
This process might take some practice. My early attempts needed several tries, but with experience, the results get a lot better. Eventually, macro focus stacking feels just as natural as regular photography, and the reward is seeing a whole new world open up in your images.
Common Challenges and How I Solve Them
Like many techniques, macro focus stacking has its hiccups. Here are a few common issues and how I work around them:
- Subject Movement: Even a tiny breeze or vibration can blur your images. I shoot indoors when possible or use windbreaks for outdoor work.
- Focus Breathing: Some lenses change the frame size slightly when focusing. Using a focus rail instead of changing the focus ring can help minimize this. Consistent framing is key, so zoom in on live view to double-check every shot lines up.
- Lighting Shifts: Consistent artificial light avoids flickering sunlight or moving clouds. I always prefer LEDs or flashes with constant output for this reason.
- Software Artifacts: Stacking programs might leave halos or blurry patches. Careful retouching or tweaking blending settings in your software usually solves this problem. I keep backup copies so I can try different stacking approaches if needed.
Subject Movement
Motion is the biggest challenge. Macro work sometimes means photographing living subjects, like small insects or plants outdoors, that won’t stay perfectly still. Patience and sometimes revisiting the subject on a calmer day make a real difference. For insects, I try photographing early in the morning, when they are less active. Some hobbyists even gently cool insects for a few minutes to slow movement (just be careful—treat living creatures humanely).
Lens Choice
Certain lenses make focus stacking easier. Macro lenses with minimal focus breathing (like many dedicated models from Canon, Nikon, Sony, or Sigma) give me more consistent image alignment. Some third party macro rails can help as well if focus breathing is showing up in my images. It’s worth renting or borrowing a few to see which setup gives the least alignment headaches.
Tips for Success With Macro Focus Stacking
Over time, I’ve picked up a few habits that help my focus stacking go more smoothly:
- Plan your shots ahead to minimize the time your subject spends on set, especially if working with living creatures. Sometimes I draw a quick diagram of starting and finishing focus points to save time.
- Keep a checklist of your camera and software settings to make sure everything is the same between shoots. Consistency leads to faster, easier stacking later on.
- Take test shots to check lighting and focus coverage before starting your main set. It’s better to fix problems at the beginning than discover missing details in post-processing.
- Don’t skip manual focus. Autofocus can hunt and be inconsistent for closeups. Fine control beats speed every time for this method.
- Give yourself extra time for each part of the process. Rushing usually leads to missed spots or blurry areas that are hard to fix later.
- Organize your files. Naming conventions and folder systems help, especially when handling large sets or going back to refine your stack after some time away from the project.
- Review final stacked images at full resolution. Sometimes small blending defects only show up at 100% zoom, so checking and retouching quickly ensures top-quality output.
Real-World Applications and Examples
Macro focus stacking isn’t just for bugs and flowers. Science and creative industries both use this style. For instance, jewelry photographers use stacking to capture fine engraving details, while watchmakers make gears and hands look sharp for catalogs. Scientists stack images of specimens for research and documentation, and artists use focus stacking for imaginative composites revealing hidden patterns on everyday objects.
- Scientific Documentation: Focus stacking delivers the clarity needed for close analysis of small parts and textures in biology, geology, and materials research. When documenting fossils, crystals, or tiny anatomical features, researchers depend on this process to study structures otherwise hidden from view.
- Creative Product Photography: Marketers and online sellers rely on crisp, detailed shots to highlight features of jewelry, crafts, or collectibles. Even food photographers use this method to show texture and wow factor in bite-sized desserts and confections.
- Artistic Portraits: Focus stacking opens new doors for personal projects. Think high-detail nature art and creative closeups for wall decor. Some artists experiment by stacking for surreal, dreamlike images where every detail, from skin pores to tiny hairs, shows in stunning clarity.
If you want to check out some portfolio examples, lots of macro photographers share before-and-after focus stacks on their websites or social media, showing how dramatic the difference can be when using this technique.
Frequently Asked Questions
Question: How many photos do I really need for a macro focus stack?
Answer: The number can vary. For thin subjects like a flat leaf, 5 to 10 images might be enough. For a 3D subject like a whole flower or a complex insect, I sometimes use 20 or even more to make sure every part stays sharp.
Question: Can I use my phone or do I need a special camera?
Answer: While dedicated cameras make it easy, some smartphones now include focus stacking features in their native apps or through third party apps. However, the quality and options are better with dedicated cameras and lenses, especially when it comes to control over exposure and image stacking.
Question: What’s the best software for beginners?
Answer: Photoshop is popular and widely available, though Helicon Focus and Zerene Stacker are made specially for stacking and tend to offer more features for complex stacks. Each program has its pros—try out the free versions to see which workflow feels most comfortable.
Ready to Try Macro Focus Stacking?
I’ve found that macro focus stacking opens up a new universe of detail and sharpness. It’s a rewarding process for anyone who loves exploring the small wonders of the world through photography. With the right setup, attention to detail, and some practice, you’ll spot new possibilities in every closeup shot. Once you’ve got the basics down, it’s fun to keep experimenting and push your creative limits with this technique. Jump in, and soon you’ll be seeing the world’s tiniest surprises in a whole new light.