Getting into macro photography can be surprisingly rewarding if you love spotting details others might miss. There’s something pretty cool about seeing the tiny world in closeup, whether it’s the veins of a leaf or the iridescence of an insect’s wing. For those who are just starting out, figuring out the best way to get crisp, eyecatching macro shots can feel a bit daunting. I’ve put together this stepbystep guide to help you get set up and start exploring the tiny details around you.
What Exactly Is Macro Photography?
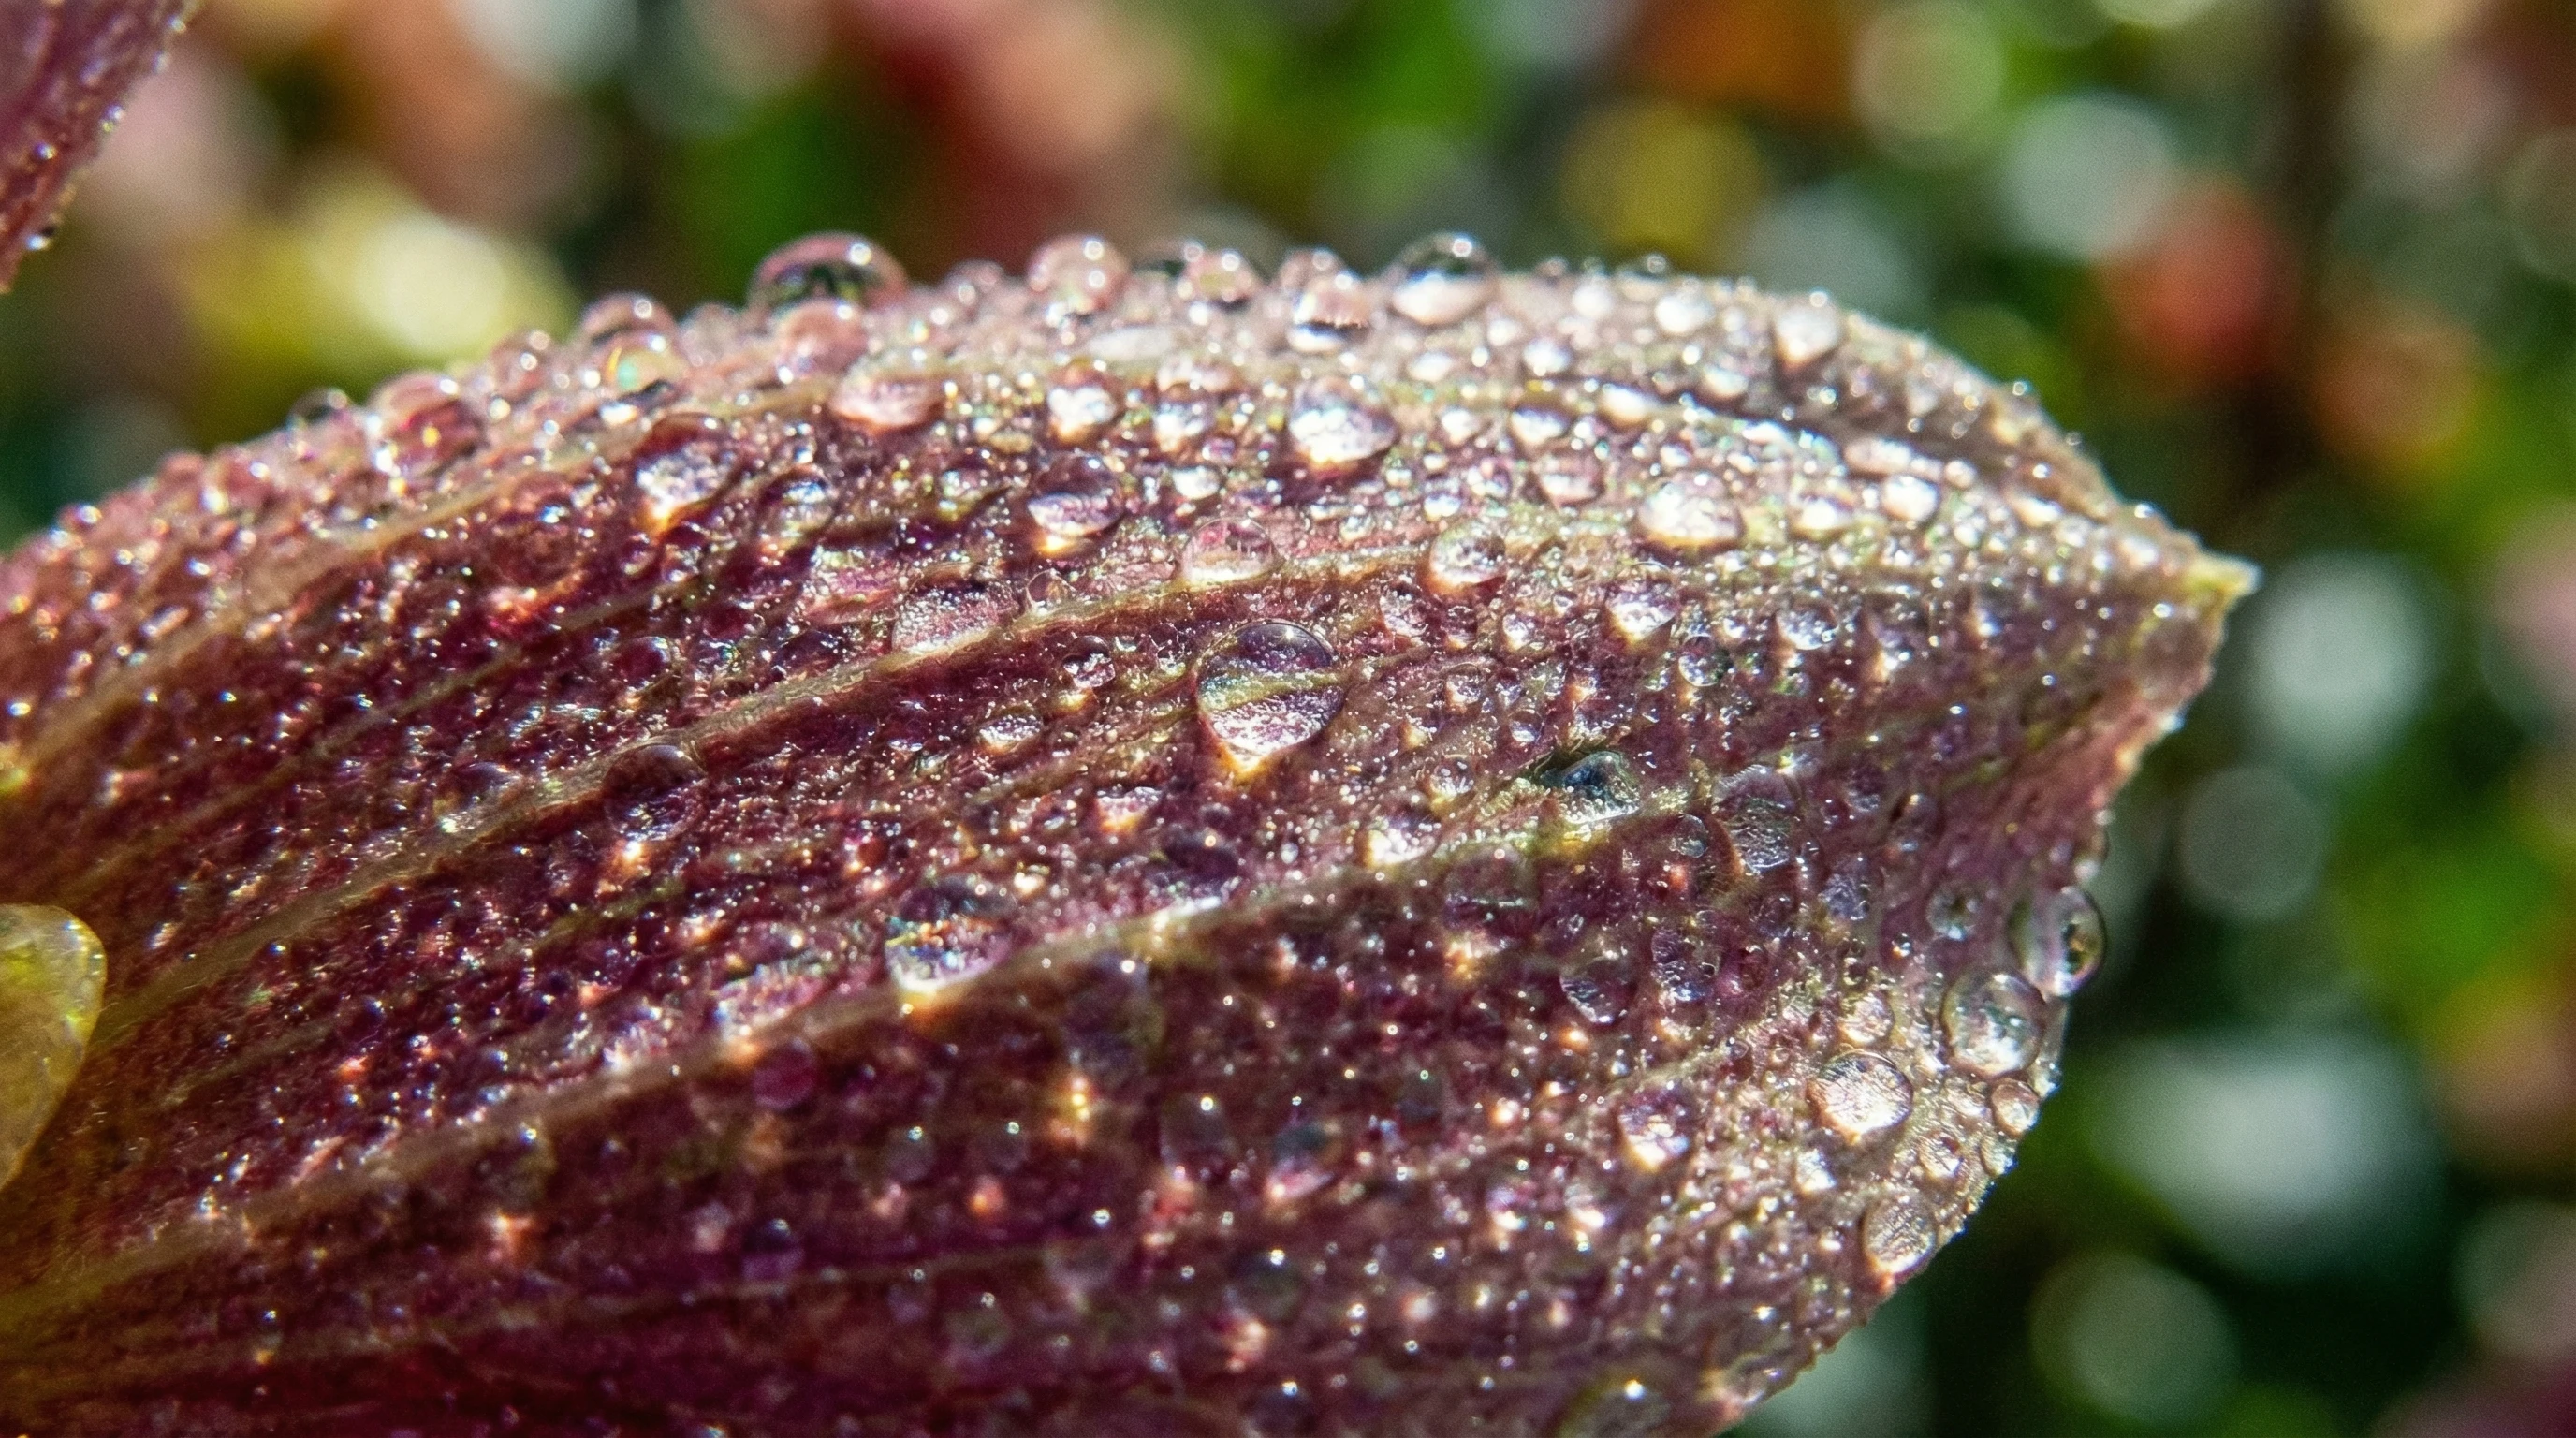
Macro photography is all about capturing subjects at a very close distance to highlight details that are usually missed by the naked eye. With macro, you’re aiming for a life-size or larger-than-life reproduction of your subject on your camera sensor. That means even the smallest bug or water droplet can suddenly feel huge and full of interesting textures.
Originally, macro photography was the domain of scientists and naturalists, but as camera gear became more accessible, it’s turned into a creative hobby for just about anyone. Whether you want stunning shots of flowers, jewelry, or the patterns on everyday objects, this area of photography opens up a whole new world of creative possibilities.
Basic Gear You Need to Start with Macro Photography
If you’re just starting out, there’s no need to rush into expensive or complicated gear. The basics can take you surprisingly far. Here’s what’s pretty helpful when you want to get going with macro photos:
- Camera: Any camera with a manual mode is handy. DSLRs and mirrorless cameras give you the most control, but you can start with a smartphone if that’s what you have.
- Macro Lens: A true macro lens lets you focus very close and get sharp detail, but there are also budget options like closeup filters, macro extension tubes, or lens reversal rings that work with your existing lenses.
- Tripod: Camera shake gets more obvious the closer you get. Using a small or flexible tripod helps keep things steady, especially in lower light.
- Lighting: Natural light is sometimes enough, but small LED lights or reflectors can make a difference, especially for indoor or low-light shots.
- Remote Shutter Release or Timer: Avoids any movement when you click the shutter, which is super helpful for those super-close shots.
You can absolutely start out with what you already own and upgrade your macro kit as your interest (and skills) grow. Over time, as you gain experience, you might decide to invest in extras like a dedicated macro flash or other accessories. Building your kit slowly allows you to figure out what works best for your style.
Getting Started: Step-by-Step Guide to Macro Photography
- Choose Your Subject: Flowers, leaves, coins, or even everyday objects like buttons or pencils make good starting points. Look for interesting textures or colors that stand out.
- Set Up Your Camera: Start with aperture priority mode (often marked as ‘A’ or ‘Av’ on your camera dial). Use a midrange aperture (like f/8 or f/11) to get more of your subject in focus. Set your ISO as low as possible to keep the image clean and crisp.
- Focus Carefully: For extreme closeups, autofocus might struggle. Switch to manual focus and take your time getting your main detail sharp. Many cameras have a focus peaking feature that highlights in-focus areas—it’s worth checking out if you have it. On some cameras, you can also use live view at high magnification to nail the focus.
- Stabilize Your Setup: Use your tripod and make sure your camera is steady. Even your breathing can shake a camera during macro shots, so steady your arms or use a remote if possible.
- Check Your Lighting: Position your subject so it’s welllit but avoid harsh midday sun. If you’re indoors, move close to a window or use a small flashlight or LED lamp for extra light. A simple white piece of paper can act as a reflector for softer lighting.
- Take Multiple Shots: Tiny differences in focus or angle can make a big difference. Try moving your camera slightly forward or back, or changing your angle, to get a variety of versions. Experimenting will help you spot what makes your macros pop.
- Review and Adjust: Zoom in on your shots and check focus and sharpness. A bit of trial and error is normal, so experiment with settings and compositions. Don’t be afraid to try new backgrounds or subjects if something isn’t working, and make adjustments to light, exposure, or positioning as necessary.
Working through these steps a few times is a solid way to build confidence with your macro technique and start seeing cool results quickly. With practice, it becomes easier to anticipate challenges and line up shots that really show off tiny details.
Things Worth Considering Before Spending on Macro Gear
Macro photography definitely has a few quirks that are helpful to know early on. Here are some things to look out for as you start shopping or shooting. These help you avoid common frustrations and choose gear that really suits your needs:
- Depth of Field: With macro, the area in focus becomes super thin, even with your aperture stopped down. Some of your subject might be sharp, while the rest falls out of focus quickly, so placement and focus are everything.
- Lenses and Attachments: Specialized macro lenses give the best detail, but filters and tubes are a good way to experiment without spending a ton of money. Starting with these can help you figure out what style you enjoy most.
- Lighting Issues: Getting enough light on a closeup subject can get tricky. Shadows can suddenly look huge. Natural light works fine most days, but consider an inexpensive ring light or small flash if indoor shooting is your thing.
- Movement and Wind: Even a small breeze can ruin a macro shot, especially outdoors. Try bringing a piece of cardboard to shield your subject, or focus on still life objects if it’s windy. Sometimes, waiting for calmer moments is all you need for a perfect shot.
Depth of Field and Sharpness
At macro distances, focus is a whole new ball game. Even the smallest movements shift your focus point. Using a tripod and focusing manually helps, but some photographers take several shots at different focus points and blend them using software (a technique called focus stacking). It’s worth exploring once you’re comfortable with the basics. Focus stacking can bring out full detail in subjects like flowers, insects, or jewelry, letting you show off every texture.
Lighting
Macro subjects love soft but bright light. I usually pick mornings or late afternoons for outdoor photos, when the sunlight is less harsh. Indoors, you can diffuse lamp light with a bit of baking paper or use LED panels for even coverage. Small clip-on ring lights for your camera can be pretty handy too. Sometimes, even a regular desk lamp shifted a little farther away works well for soft, directional lighting.
Lenses and Accessories
If you’re playing around before committing to a macro lens, try closeup filters (they screw onto the front of your lens like a magnifying glass) or extension tubes (which go between your camera and lens). Both are budgetfriendly ways to get closer to your subjects and see if you enjoy macro photography longterm. There are also clamp-on macro lenses designed for smartphones, perfect for trying out closeup work with minimal investment.
Level Up: Practical Tips and Tricks for Better Macro Photos
Once you’ve got the basics down, these little tweaks can really help your shots stand out:
Pay Attention to Composition: Even with tiny subjects, things like rule of thirds, leading lines, and background color make a difference in how eyecatching your photo feels. Breaking standard composition rules can also work well to create something unique.
Look for Patterns and Colors: Macro reveals repeating shapes, lines, or unexpected colors in everyday items. Filling the frame with these makes your images pop. For example, try shooting the surface of fruit, fabric, or rusted metal and see how patterns emerge.
Mind Your Background: A simple, uncluttered background puts the spotlight on your main subject. Sometimes just moving a few inches or using a piece of colored paper underneath can totally transform the shot and help the subject stand out.
Try Focus Stacking for Extra Sharpness: If your camera or editing software supports it, combine several photos taken at slightly different focus distances. This gives you crisp detail across the whole subject, which is especially cool for bugs or flowers. There are free and paid programs that make the stacking process easier if you find yourself loving the technique.
Explore Different Angles and Perspectives: Get down low, shoot from above, or look from the side. Macro is all about surprise and seeing things from a new perspective! Trying various perspectives opens up creative options, and sometimes a small move can result in a completely transformed image.
Use Props or Household Items: Everyday items such as kitchen utensils, stationery, or beads can become exciting subjects under macro. Playing with reflections from foil or glass tiles also adds cool effects to your photos.
Patience Pays Off: Macro work can be fiddly and sometimes frustrating, especially when dealing with moving insects or tricky lighting. Take your time, be patient, and don’t be afraid to try again until you get the image you want.
Common Questions About Macro Photography for Beginners
Things can get confusing when you’re exploring a new type of photography. Here are answers to questions I had when starting out:
What’s the cheapest way to try macro photography?
Closeup filters or extension tubes for your current lens are affordable and a good way to experiment before buying a macro lens.
Do I need a tripod?
While you can shoot handheld in bright light, I find a tripod really boosts the sharpness and lets you use lower ISO settings for even better image quality. A tripod is especially helpful when using focus stacking or shooting in low light indoors.
How do I get the whole subject in focus?
It’s tricky because of shallow depth of field. Use a smaller aperture (higher fstop number), position your camera so the important part of your subject is lined up flat with the lens, or try focus stacking.
Can smartphones do macro photography?
Many smartphones have a macro mode or clipon macro lenses available. The quality might not match dedicated cameras, but you can still grab some fun shots and develop your eye for detail. Several apps let you manually set focus and exposure as well, giving more creative control.
Real-World Uses for Macro Photography
Macro isn’t just about making art; there are a bunch of practical ways people use it every day:
- Nature Exploration: Getting close to bugs, flowers, or plants helps spot species and understand tiny ecosystems. Scientists and hobbyists alike use macro shots to document nature in super detailed ways or even identify differences among plant varieties, fungus, or insects.
- Product Photography: Sellers often use macro to highlight texture and details of small products like jewelry or crafts for their online shops. High-resolution macro images can make items more attractive and show off craftsmanship that regular photography can miss.
- Creative Projects: Macro is popular in scrapbooking, art, and design, helping capture patterns and textures up close that add a special touch to creative work. Many artists use macro photographs as background textures or elements in mixed media projects.
- Education: Teachers and students use macro to examine specimens or objects for science and art classes. Visualizing fine details helps bring learning to life, whether exploring plant biology or the structure of minerals.
- Forensics and Inspection: Macro photography is reliable for documenting small evidence in crime scenes, or for closely inspecting jewelry, electronics, or worn items that need repairs. The fine details captured can be crucial in many technical fields.
Jumping into macro photography gets you looking at the world differently and trains your eye to spot details you’d usually walk past. With a little patience and some experimenting, you’ll start capturing images that surprise even yourself. Having the confidence to get up close and experiment is what will set your shots apart in this nextlevel cool genre.