Macro photography opens up a totally new world that most of us miss in everyday life. From dewdrops glistening on a spider’s web to the fuzzy details of a bumblebee, there’s a ton to uncover just by looking closely at tiny subjects. As someone who started out not knowing the difference between a macro lens and a magnifying glass, I’ve found that getting into macro photography isn’t as intimidating as it looks. All you need is some basic equipment, a bit of patience, and a curious eye. Here’s everything I wish I’d known when I started out.
Getting to Know Macro Photography
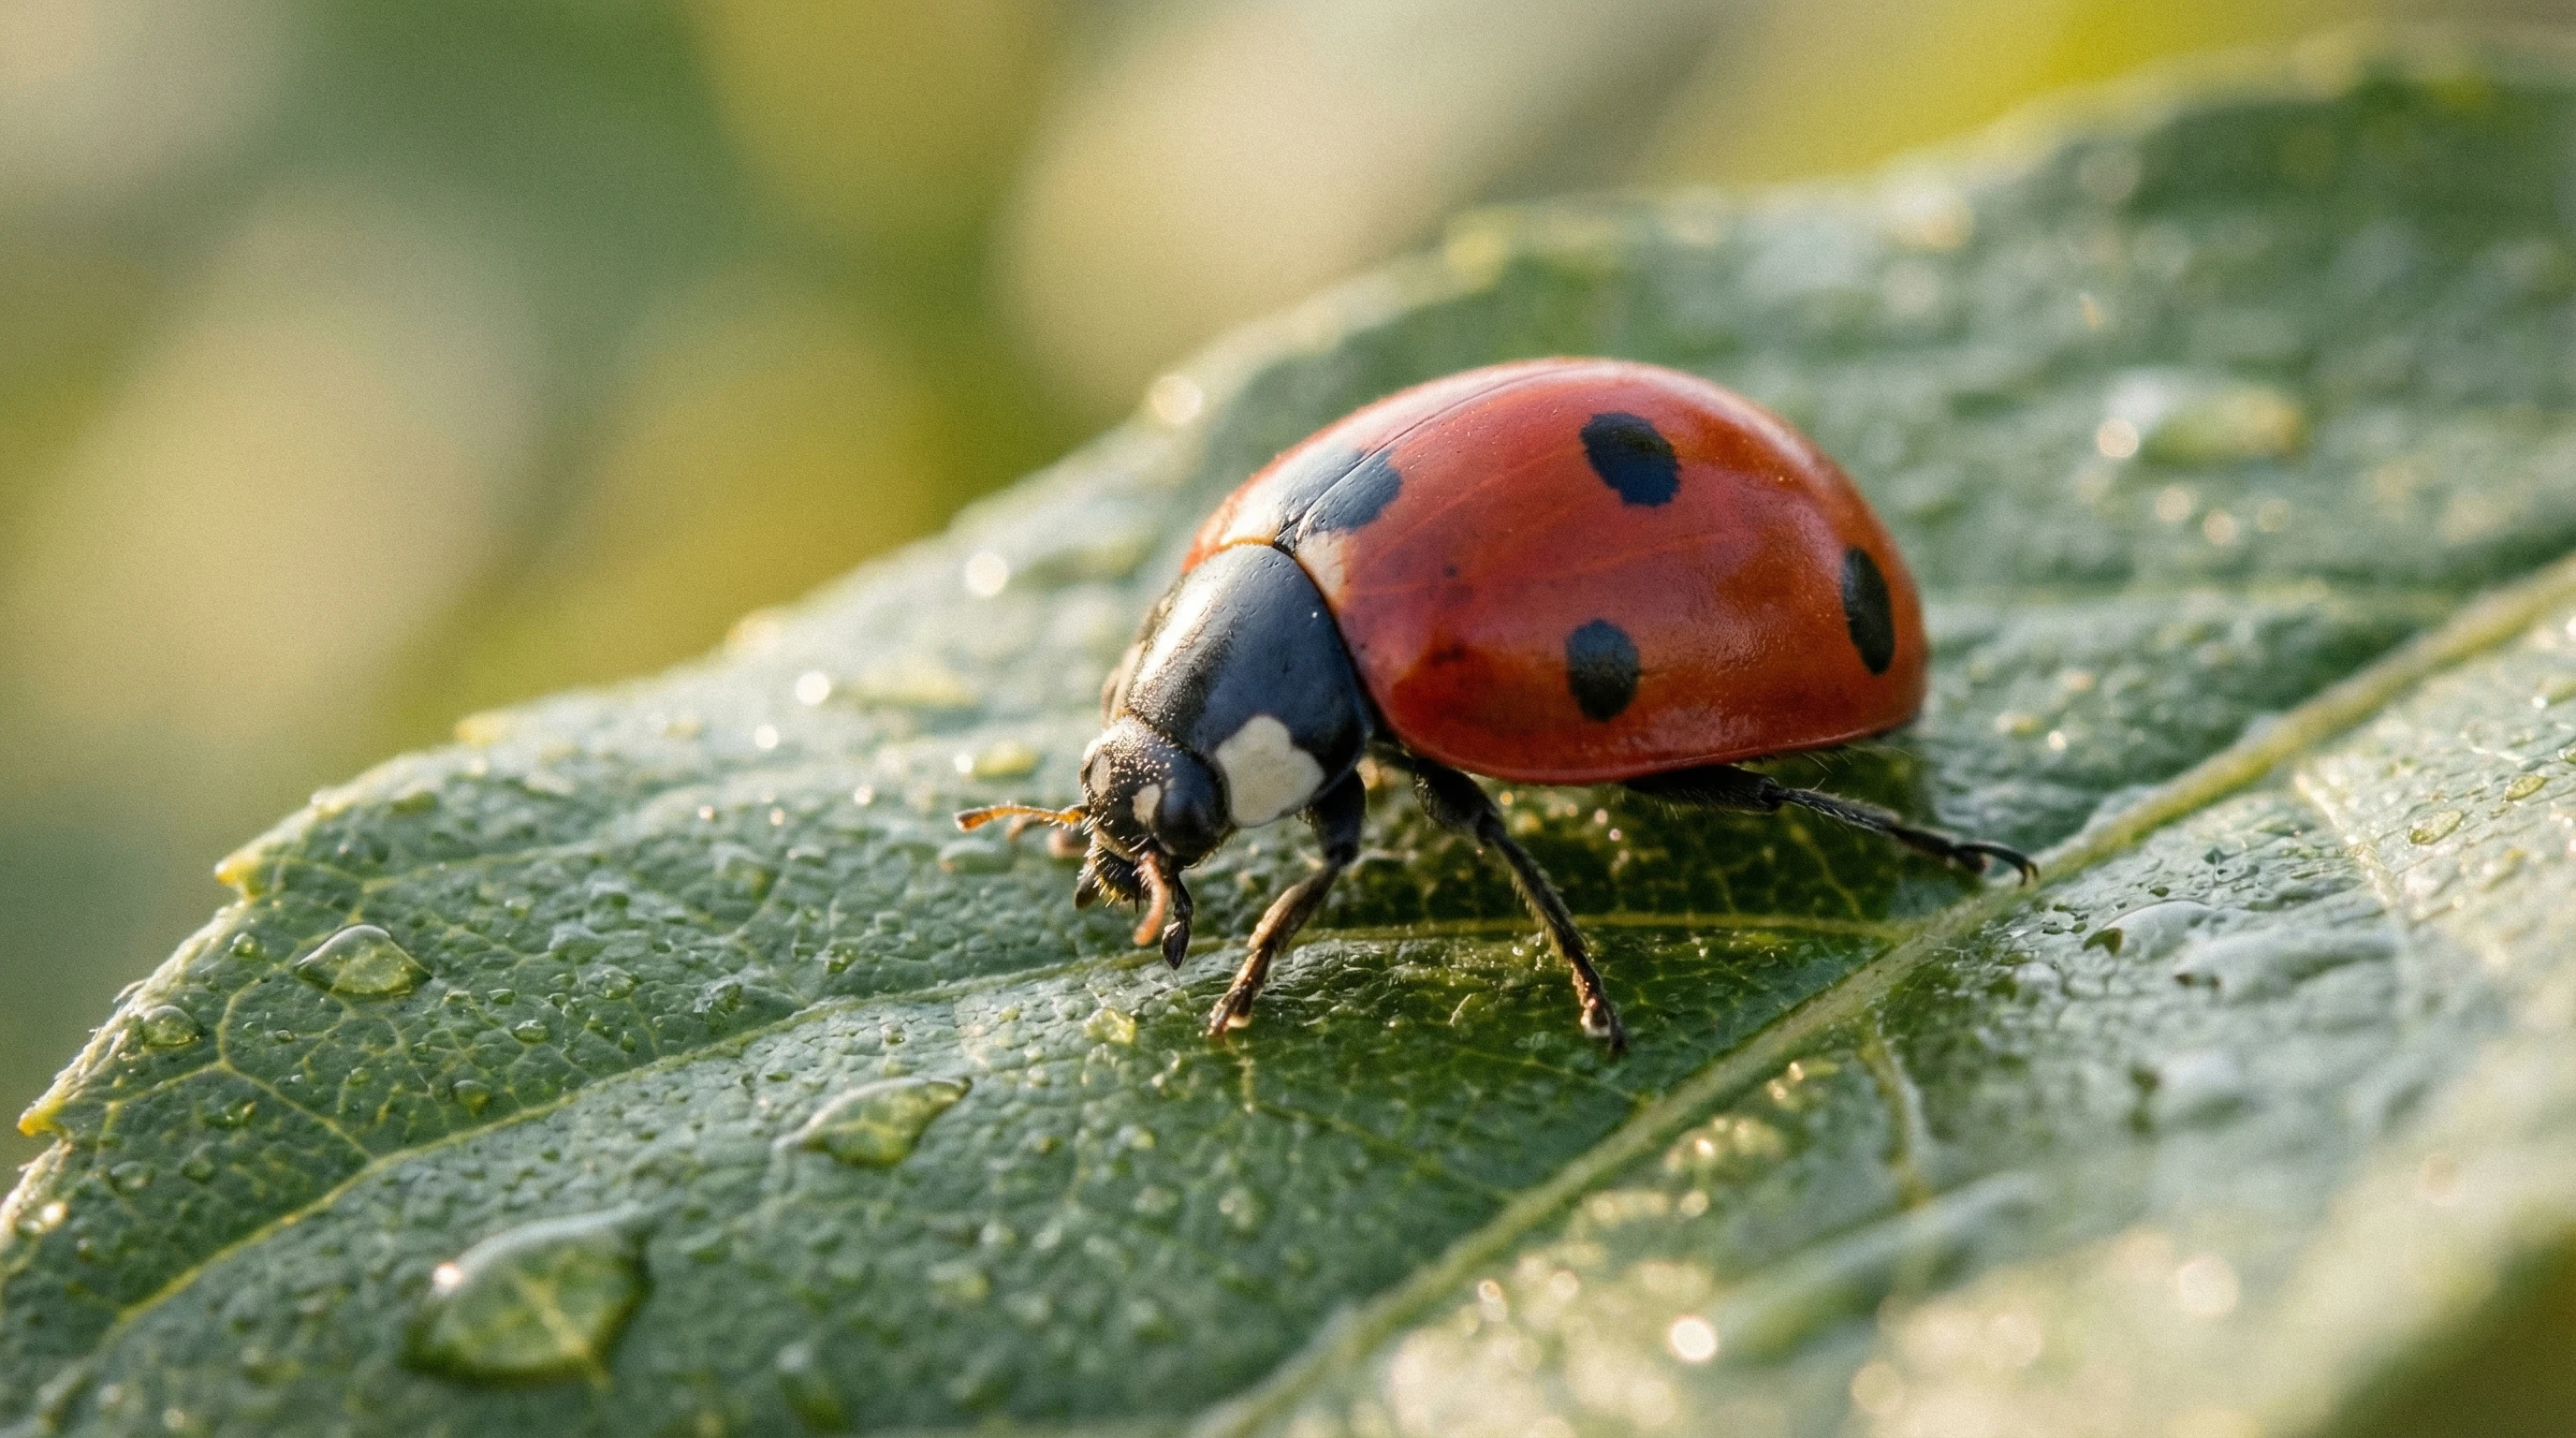
Macro photography is all about capturing subjects up close to reveal details that aren’t visible to the naked eye. Most people think of insects or flowers, but it can be anything, like coins, feathers, fabric, or even little everyday objects. The main idea is that your subject fills most of the frame. If you’re wondering how close is “close,” a true macro photo usually means the image on the camera sensor is at least the same size as the subject in real life (1:1 magnification).
Interest in macro photography has really picked up with better digital cameras and phone lenses. According to Photo Industry Report, searches for macro gear and guides have grown about 40% in the past three years. Even hobbyists who take garden shots use these techniques to make their everyday surroundings look totally new. For many, it’s about exploring creativity and spotting the little wonders in your backyard.
The earliest macro photos were taken more than a century ago, mostly for scientific research. But now, anyone with a modern camera (or even a smartphone with clipon lenses) can check out macro photography. New tech has made the hobby more accessible, but the basics, like lighting, focus, and patience, are still the same.
What You Need for Macro Photography
Getting started with macro photography doesn’t have to break the bank. While prolevel macro lenses can be pricey, you can make do with basic gear to kick things off. Here are the essentials I’ve found really helpful:
- Camera: Any interchangeable lens camera works well. Some smartphones now offer pretty good macro modes and clipon lenses you can experiment with.
- Macro Lens: True macro lenses let you focus close enough to get sharp and detailed images. Look for one that says “1:1 magnification”—that’s ideal.
- Tripod: When focusing up close, even slight hand movement looks like an earthquake. A sturdy tripod really helps keep things sharp.
- Lighting: Good lighting is key. Try natural window light, a basic ring light, or an affordable flash with a diffuser to get even light without harsh shadows.
- Remote Shutter or Timer: A cable release or your camera’s timer comes in handy for avoiding camera shake, which really matters at high magnifications.
Certain accessories make things easy, too. Extension tubes, closeup filters, and reversing rings are pretty handy ways to turn a standard lens into something more macrofriendly without dropping a ton of cash. These let you get closer but might mean some loss in image quality compared to a proper macro lens.
Quick Steps to Taking Your First Macro Shots
Jumping into macro photography can feel overwhelming, but breaking it down keeps things simple. Here’s what I suggest for anyone just starting:
- Pick Your Subject: Begin with something easy to photograph—an interesting leaf, a flower, or maybe a household object. Stay indoors if you want to avoid wind.
- Set Up Your Camera and Lens: Attach your macro lens, extension tubes, or clipon filters. Mount your camera on a tripod for stability.
- Pay Attention to Light: Use a window or lamp for even lighting. Avoid harsh midday sun; cloudy days give soft, diffused light, which works great.
- Get in Focus: Use manual focus if possible. Autofocus can hunt and struggle with closeups. Fine-tune by gently rocking the camera forward and back to nail sharpness.
- Adjust Settings: Start with a smaller aperture (like f/8 to f/16) for more depth of field. Macro shots can get blurry fast. Increase ISO if needed, but try to keep it low for less noise.
- Take the Shot: Use a remote or selftimer to avoid touching the camera. Review and adjust as needed.
Repeating these steps builds skill fast. The more you practice, the better you get at noticing what works for certain subjects and situations. Don’t be afraid to experiment; playing with camera angles, shooting times, and backgrounds is part of the fun.
What to Keep in Mind Before Buying Macro Gear
Jumping into macro photography comes with unique challenges. Avoiding a few rookie mistakes (most of which I made myself) saves a lot of time and helps you get better shots.
- Depth of Field: Macro images have a razor-thin zone of focus. Even at narrow apertures, just a thin slice of your subject is sharp. Careful focus and steady hands, along with a tripod, help a lot.
- Lighting Issues: Getting close often blocks natural light and casts shadows. Moving an external light source or using diffusers can solve this problem.
- Camera Shake: Small movements matter a lot. Always use a tripod and a remote shutter if you can.
- Backgrounds: With your subject filling the frame, busy backgrounds can look messy. Using colored paper or a cloth to create clean, nondistracting backgrounds works wonders.
Depth of Field
One thing that tripped me up early on was how little of my subject stayed in focus. Macro shots turn even the smallest shakes or changes in focus into soft, blurry images. Using smaller apertures helps, but don’t be afraid to take multiple shots with different focus points (called focus stacking) and combine them later in editing. Software like Helicon Focus or even Adobe Photoshop can handle this, and plenty of free tutorials are available online. Focus stacking can seem intimidating, but once you try it, it feels natural and opens up more possibilities for sharp, stunning images.
Lighting
Good light brings macro shots to life, but getting enough of it is tricky, especially because your own camera or hands often block the light. I use a simple LED ring light or a piece of white paper to bounce natural window light onto my subject. Cheap alternatives like DIY reflectors (a piece of foil works!) make a big difference. If you shoot outside, early morning or late afternoon brings beautiful, soft light that makes details stand out. Don’t worry if you don’t have fancy flashes; you can create balanced lighting with simple at-home solutions.
Stability
Especially as a beginner, nothing feels worse than a sharp photo turning out blurry because of a shaky hand. That’s why I depend hugely on tripods, remote triggers, or the built-in timer on my camera. Some macro photographers also use beanbags to steady their setup on uneven surfaces. Lightweight travel tripods are a great help if you are taking your camera outdoors or into the garden. When you don’t have a tripod handy, bracing your camera on a sturdy table or using a bag as a cushion can steady your shot.
Background Choices
The best macro photos keep the focus on the subject, not what’s behind it. I keep a few colored cards or small fabric swatches with my gear to swap in as backgrounds, especially for indoor sessions. It sounds basic, but it’s a super useful trick for making colors pop and blocking distractions. If you’re outdoors, you can even use leaves or stones as quick and easy backdrops. Simple backgrounds help your subject stand out and give your photos a professional look.
Plenty of these obstacles become less of a headache the more you practice. Patience, creative problem-solving, and a steady setup are what make macro photography fun and rewarding. Over time, you’ll spot new tricks and gain the confidence to try more challenging subjects, such as tiny insects or moving creatures.
Leveling Up: Tips for Better Macro Shots
Once you’re comfortable with your gear, experimenting with different settings and creative approaches can really take your macro photography up a notch. Here are a few tricks I’ve learned that can make a big impact:
Try Focus Stacking: Taking multiple pictures with different focus points lets you blend them for extra-sharp images from front to back. Free software and plenty of online tutorials can walk you through the process.
Change Your Perspective: Shoot from different angles or even get down to the level of your subject. Trying unexpected perspectives often leads to striking results. Moving around your subject creates fresh looks and can add layers or dimension to your photos.
Play with Lighting: Use backlighting, side lighting, or reflectors to show off textures and create mood. Even a cheap flashlight or a homemade snoot helps control the look of your light. Changing the direction of light completely alters how the details and colors appear.
Get Creative with Water Drops: Adding a little water with a spray bottle on leaves or petals adds a sparkle and highlights tiny details. Just don’t drown your subject! Water drops act as natural magnifiers and often reflect surroundings in interesting ways.
Little creative choices, such as shooting on rainy mornings or after sunrise, give your photos a punch that’s tough to get in other styles of photography. Experimenting with colored gels or background lights can also inject some next-level cool effects into your images.
Equipment in Action: Where Macro Photography Shines
Quality gear matters more as you dig into macro photography, especially if you want to blow up your photos for printing or use them in creative projects. True macro lenses deliver sharper and more colorful images. But even affordable closeup setups can help you start exploring subjects in fresh ways.
- Nature Photography: Shooting insects, water droplets, and flower details can uncover really cool patterns and textures. Raindrops on spiderwebs, the scales on a butterfly’s wing, or the fuzz on a caterpillar all become fascinating through a macro lens.
- Product Photography: Macro shots bring out the quality in jewelry, coins, or crafts, which is helpful for selling online. Macro images are often used for catalogues, promotional materials, and websites because of their clarity and detail.
- Creative Projects: Experiment with everyday stuff, like bubbles, fabrics, and spices on a cutting board, for photo art and design materials. Some people even use macro photographs as digital desktop wallpapers or to create greeting cards.
Frequently Asked Questions
If you’re just getting started, you’ll probably have a few questions—I know I did! Here are a few answers based on what people ask most:
Question: Can I do macro photography without an expensive camera?
Answer: Absolutely! Many smartphones have excellent macro modes or take clip-on macro lenses. There are also affordable closeup filters and extension tubes for beginner cameras.
Question: Why are my macro photos blurry?
Answer: Blurriness usually comes from camera shake or not enough depth of field. Try using a tripod, a remote shutter, and a smaller aperture. Focus stacking helps too.
Question: How can I get more of my subject in focus?
Answer: Use a smaller aperture (higher f-number) and focus carefully on the most important part of your subject. For shots that need a lot in focus, take several photos at different focus points and use stacking software to combine them.
Final Thoughts
Macro photography gives you a reason to slow down and really look at the world up close. With even basic gear and a bit of experimenting, anyone can get great results. Try it in your backyard or on the kitchen table. There’s always something interesting to stumble upon—it just takes a closer look.
Curiosity and patience do half the work; the rest is having fun with your camera and tracking down new subjects every chance you get. The beauty of macro photography is that the next discovery could be hiding in plain sight, waiting for you to find it.