Great cinematic portraits often look like they came out of a movie, but you don’t need a big budget studio to create this effect. You can use your smartphone and everyday items at home to make dramatic, professional looking portraits. I want to show you how straightforward it can be to get started.
Why Cinematic Lighting Makes a Difference in Smartphone Portraits
The difference between an ordinary photo and a cinematic portrait often comes down to how the subject is lit. Cinematic lighting helps set a mood and gives portraits more depth and character. I’ve found that even with smartphones, careful lighting setups can turn a basic shot into something that feels like a scene from a film.
Phones keep improving in their camera technology, but light is what really shapes an image. A quick search shows that many of the most shared smartphone portraits feature creative lighting because it helps draw attention and tells a story in one frame. If you’re hoping to try this at home, it doesn’t matter if you have the latest device. What matters more is learning how to use what you already have for dramatic effect.
Cinematic lighting also lets you set the mood—whether you want an eye-catching, high contrast look or something soft and dreamy. I always tell friends to check out some classic film stills for inspiration. You’ll notice the lighting does most of the heavy lifting to tell the story, and you can get similar results at home if you experiment and really get a sense of why certain setups work.
Simple Gear for Cinematic Smartphone Portrait Lighting at Home
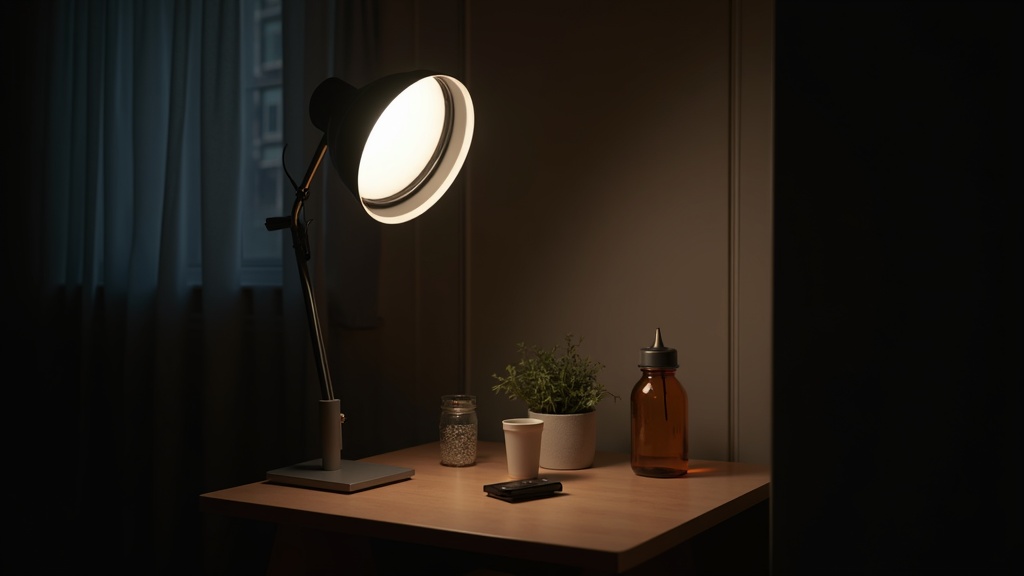
You don’t need to buy expensive studio lights to get a cinematic look. Many items in your home can help you build your own lighting setup. I rely on just a few basics, and I’ll explain why each one matters.
- Smartphone: Almost any recent smartphone will do. Features like manual controls or “Pro Mode” give you more flexibility, but they aren’t strictly necessary to get started.
- Household Lamps: Desk lamps, floor lamps, and even flashlights all work. Picking lamps that let you adjust the angle is really helpful.
- Modifiers: Things like bedsheets, shower curtains, tracing paper, or even white T-shirts are great for softening light. Black shirts or cardboard can block light to create shadows. Aluminum foil and mirrors are good for bouncing extra light where you need it.
- Tripod or DIY Stand: Keeping your phone steady makes a big difference, especially in low light. Piling up books works if you don’t have a tripod.
Don’t forget to gather up some clips, rubber bands, or tape to hold everything in place. Sometimes I’ll use a clamp or even a stack of magazines to prop up a lamp at just the right height. Creativity with your setup can be as important as the gear itself.
Starter Lighting Setups for Cinematic Portraits
Getting a cinematic feel in your portraits starts with understanding a few classic setups. Here are some approaches I use when I need easy but dramatic results at home.
Rembrandt Lighting for Drama
This style is named after the painter Rembrandt. It’s famous for producing a triangle of light on the shadowed cheek. Here’s how I create it at home:
- Place your main light (desk lamp or similar) at about 45 degrees to one side of your subject’s face and slightly above eye level.
- Soften the light by taping a piece of tracing paper or draping a white cloth over the lamp, making sure it doesn’t touch anything hot.
- If you want deeper shadows, turn off other lights in the room or use a dark towel or cardboard on the opposite side to absorb light.
Rembrandt lighting is great for adding mood and turning an ordinary scene into something more striking. I like to use it when I want my photos to have a sense of mystery or emotional weight.
Split Lighting for Strong Contrast
Split lighting means lighting only one side of the face and leaving the other in shadow. This works for dramatic, cinematic looks.
- Set your lamp so it illuminates just one side of the face (exactly 90 degrees from the front).
- If you want to highlight the other side just a bit, bounce some light with a piece of foil or a handheld mirror.
Split lighting has a mysterious, bold feeling. I use it when I want to make a portrait feel intense or intriguing.
Butterfly Lighting for a Classic Look
For a softer, more glamorous effect, often seen in old Hollywood, try butterfly lighting. Here’s what I do:
- Put your light source (like a lamp with a diffused bulb) above and in front of the subject, aimed straight down toward the face.
- The light should create a small shadow under the nose (shaped like a butterfly, which is how it gets its name).
- You can use a piece of white cardboard or a pillow underneath to bounce light up and soften shadows under the chin.
Butterfly lighting is flattering for most faces and is forgiving if your lamp or phone camera doesn’t produce perfect results. It’s especially useful for portraits where you want a softer, welcoming vibe.
Things You Really Need To Think About With Smartphone Portrait Lighting
I’ve learned a few things can make or break a cinematic look, even when using simple gear at home. Paying attention to these details will give your portraits that extra kick.
- Color Temperature: Different lightbulbs have different colors. Mixing daylight from windows and warm indoor bulbs sometimes gives portraits an orange or blue cast. Try to use bulbs with the same tone, or only shoot with one type at a time to keep colors looking natural.
- Light Intensity and Distance: The closer your light is to your subject, the softer the shadows (as long as you diffuse it). If the light is too harsh, your phone might struggle with overexposed spots. Diffusing the lamp with a material like a sheer curtain helps fix this problem.
- Background: Simplifying the background helps focus attention on your subject. I often hang a blanket, curtain, or even use a blank wall behind the person I’m photographing.
- Movement: Low light requires a steady hand or stable support. If your photo comes out blurry, try propping your phone up on books or whatever else is handy.
Dealing With Shadows and Light Spill
Controlling where the light lands matters as much as the light itself. If you’re seeing unwanted shadows or bright spots behind your subject, move your light slightly to the side, or block the spill with a piece of cardboard.
If you see shadows on the face you don’t want, bounce extra light back with a white piece of paper or a mirror. I sometimes use a pillow or sheet to reflect the right amount of fill light into darker areas. These tweaks let you really fine-tune your photo.
Tips for Taking Better Cinematic Portraits With Your Smartphone
Here are more ways I get the most out of simple home setups:
- Use Manual Mode: Many smartphones let you control focus, brightness, and even color temperature in “Pro” or “Manual” mode. Lowering the ISO and adjusting the exposure helps prevent washed-out highlights.
- Lock Focus and Exposure: Tapping and holding on your subject’s face locks focus and brightness. This stops the camera from readjusting mid shot.
- Edit for Mood: Even basic editing apps let you tweak contrast, shadows, and color. Boosting contrast and lowering saturation often helps achieve that cinematic look.
- Shoot in RAW if Possible: Some phones let you take photos in RAW format. This gives more flexibility for editing shadows and highlights without losing detail.
If your phone supports shooting in portrait mode, use it to add extra background blur and make your subject stand out. Just make sure there’s good separation between the subject and the background for the effect to work well.
Creative Ideas for Home Lighting Setups
If you want to experiment past the basics, here are some fun tricks that have worked for me:
- Use colored gels (or even colored plastic folders) over your lamps for interesting effects. Just make sure the material is heat safe.
- Reflect light through textured objects like lace curtains or a colander to add unique patterns and visual interest to your portrait.
- Try shooting through glass, bottles, or wet windows to create blur and light streaks for extra atmosphere. Even a ziplock bag with petroleum jelly smeared on it can give wild, dreamy looks when placed in front of the lens.
Common Portrait Lighting Scenarios at Home
- The Film Noir Look: Go for a strong side light and a dark background. Add a bit of haze from a humidifier or kitchen spray for visible light beams.
- Soft Sunrise or Sunset: Use a warm (orange or yellow) bulb behind or to the side for a golden hour effect. Place a curtain in front to diffuse the glow and mimic early morning light.
- Backlight With Silhouette: Put a lamp behind your subject and shoot towards it. Lower your room’s ambient light for a dramatic outline, and use a little fill light from the front if you want to see facial features.
Frequently Asked Questions
Question: Can I use just one lamp?
Answer: Yes. Most cinematic portraits rely on a single strong “key light.” You control where the light goes by moving it or adding reflectors. The result can be striking and dramatic even with only one lamp.
Question: What if my home lights are too weak?
Answer: Move them closer or add a reflector to bounce more light. Even a basic flashlight, when diffused with a tissue, works surprisingly well.
Question: How do I make the background less distracting?
Answer: Use a solid colored sheet or wait until evening when less outside light comes through the windows. Position your subject farther away from the background to add blur using portrait mode, if your phone offers it.
Starting with Cinematic Smartphone Portrait Lighting at Home
Setting up cinematic lighting at home doesn’t require studio gear or years of experience. With a smartphone, a couple of lamps, and a creative approach, you can give your portraits a unique look. Experimenting with different setups builds your skill and helps you stumble upon what works best in your own space.
The main thing is to start simple and build up from there. I encourage you to try a few of these setups next time you want to take a portrait with your phone. Small changes in lighting can lead to big changes in how your photos look and feel. Spending a little extra time on these setups will help your smartphone portraits reach that next-level cool, cinematic vibe.