Off-camera flash photography opens up all sorts of creative options for anyone looking to level up their images. I remember when I first moved beyond my camera’s built-in flash. The results immediately looked more professional, and I was able to control light in ways I never imagined. If you’re new to this, the number of gear choices and technical terms can seem a bit much at first. I want to make this easier for you by sharing the basics and giving you a roadmap to get going with confidence.
Getting the Right Gear for Off-Camera Flash
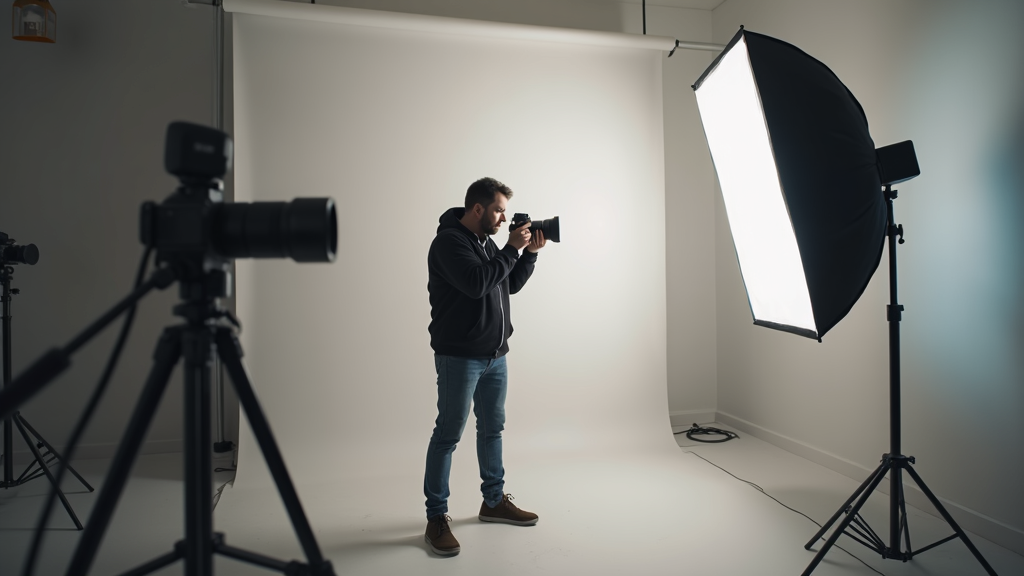
Having the right equipment for offcamera flash makes a big difference in both your results and your overall experience. Moving your flash off the camera instantly gives you more control over how light shapes your subjects. This technique is really popular in portrait, commercial, and event photography, but can be used pretty much anywhere you want to add or soften light.
Starting out, you don’t need the fanciest kit. I began with a simple, reliable flash and a couple of key tools. Here are some main types of gear you’ll want to know about:
- External Flash (Speedlight): This is a portable light source that works separately from your camera’s built-in flash. You can control its power and direction, which is a big upgrade for lighting.
- Triggers and Receivers: These let your camera “talk” to the flash from a distance, often using radio waves or infrared. Wireless triggers are especially handy for moving around freely.
- Light Stands: These hold your flash at exactly the height and spot you want, which is really important for both safety and creativity.
- Modifiers: Tools like umbrellas, softboxes, and reflectors help shape and soften the light. Even a simple umbrella can give your portraits a huge boost.
Basic offcamera flash kits are widely available and don’t have to break the bank. If you’re just starting, I suggest picking up one reliable flash, one trigger, and a softbox or umbrella to practice with.
Understanding Off-Camera Flash: Key Concepts Explained
Learning a few key terms helped me make sense of offcamera flash photography early on. I want to break these down so you can understand them at a glance:
- TTL (Through-The-Lens): A camera mode where the flash automatically adjusts its power based on your scene. This is really useful for beginners and on-the-go situations.
- Manual Mode: You control how much light your flash outputs. This is ideal for full creative control once you’re ready.
- Sync Speed: The fastest shutter speed at which your camera’s shutter can sync with a flash. Most cameras have a sync speed around 1/200 or 1/250 of a second.
- High-Speed Sync (HSS): Lets you use flash at even faster shutter speeds for outdoor portraits or creative effects.
- Flash Power: Usually shown as fractions on the flash (like 1/1, 1/2, 1/4). Lower fractions mean less light, which helps balance how much flash mixes with available light.
Grasping these basics early on helped me experiment with confidence and adjust to different environments. You’ll find that once these terms start making sense, your photography will feel less intimidating and you’ll step into creative control much faster.
How to Get Started with Off-Camera Flash
Jumping into offcamera flash was easier for me once I broke the process down step by step. Here’s what I recommend when you’re getting started:
- Start Simple: Set up your flash on a light stand and use a wireless trigger to fire it. Find a willing subject (or just a favorite object at home) and move the flash around to see how light direction changes the look.
- Learn Positioning: Placing the flash at a 45-degree angle to your subject gives a nice, natural look. As you grow more comfortable, mix up the positions to see the creative effects of side, back, or top lighting.
- Balance Ambient Light: Try keeping your shutter speed at or below the camera’s sync speed, and adjust ISO and aperture until the background looks right. Then, dial in your flash power to fill in your subject.
- Experiment with Modifiers: Use diffusers, umbrellas, or softboxes to soften hard shadows and create a flattering light. Even bouncing flash off of a white wall or ceiling can improve results fast.
- Review, Adjust, Repeat: Check your photos, tweak flash power or placement, and keep shooting. I found repetition helped build my confidence quickly.
Focusing on these steps helps you understand the basics and get pleasing, repeatable results with minimal frustration. You’ll see progress each session, and those small wins boost your motivation to keep learning.
Challenges and Considerations Before You Start Shooting
Moving offcamera with flash brings a few practical challenges, but a little prep goes a long way. Here are a few things I’ve run into and how I’ve handled them:
- Learning Curve: Manual modes and multiple flash setups can look confusing. Start with a single flash, shoot in manual, and increase complexity only as you grow comfortable.
- Recycle Times: Flashes need a moment to “recharge” after each pop. Investing in rechargeable batteries and keeping extras can help you keep pace.
- Color Balance: Flash often looks different from natural or indoor light. I carry a small set of colored gels to match the flash to room lights or to add creative effects.
- Trigger Reliability: Some triggers can misfire, especially if you use cheaper models or shoot outdoors. I suggest sticking with well-reviewed brands and always testing before a big shoot.
Recycle Time
When I first started, I didn’t realize how important fast recycle time was if you want to shoot lots of portraits or moving subjects. Slow recycle times can cause missed shots. Using external battery packs or more advanced flashes solves this pretty well. Over time, as you shoot in busier environments, you’ll notice the impact a slow flash can have on your workflow, so planning around this is a good idea.
Color Consistency
Mixing flash with room or daylight can sometimes make photos look odd in color. Attaching a color correction gel over your flash makes it easier to match other lights for naturallooking results. Testing a few gel strengths before a shoot will give you the confidence that colors in your photo won’t clash unexpectedly.
Flash Power and Distance
Flash gets weaker the farther it’s placed from your subject. If you’re shooting a group or a big space, consider using more powerful flashes or adding extra units as you learn. Also, be mindful that the modifier you use (softbox, umbrella, or reflector) can affect both the power and the spread of your light. Play around with distances to get a sense of what works best in your preferred shooting environments.
Storage and Portability
Lugging stands and modifiers around is something I didn’t think about at first. Finding lightweight stands and popup modifiers helped me shoot comfortably on location or even just in my living room. Some brands offer collapsible modifiers and stands that fit into small bags, making it easy to pack up your kit for spontaneous shoots or travel photography.
With a bit of thinking ahead, these small challenges become part of a smooth routine. Developing your own organization system—like color coding gels or labeling battery packs—speeds up setup and makes you look more professional, even as a beginner.
Creative Tips: Taking Flash Photography Further
Once you’ve got the basics, offcamera flash becomes an awesome creative tool. There are tons of ways to use it, but here are some tips that helped me build my own style:
Play With Angles: Lighting your subject from the side or behind can give your photos mood, depth, or even create dramatic silhouettes. Moving your light source just a bit can change the vibe of a portrait completely. Feel free to shoot lots of angles and review which ones tell the most interesting story for your subject.
Modify Your Light: Swapping out softboxes for umbrellas or even barebulb flashes changes the softness and direction of shadows. Experiment to see which tools fit your style best. Each modifier has its own qualities—umbrellas are quick to set up and portable, softboxes provide a focused yet soft light, and barebulb flash creates sharper shadows.
Mix With Existing Light: Try combining flash with natural window light, streetlights, or candlelight for interesting color and shadow effects. Layering multiple light sources can help your images stand out, especially during golden hour or when shooting in low light.
Freeze Motion: Use the quick burst of flash to freeze movement, whether that’s hair flipping, drinks splashing, or someone mid-jump. This adds a sense of energy to your photos. Syncing your flash with your camera’s timing settings lets you stop time in creative ways.
Use Grids or Snoots: Attach a grid or snoot to your flash to focus the beam on just one part of your subject. This helped me create striking portraits by putting light right where I wanted it. Specialty modifiers like these can make a huge difference when you want next-level cool effects or just want to shine a light on a subject’s features.
Photo forums and online galleries can offer inspiration and help you shape your creative direction as you grow. You’ll stumble upon new ideas every time you check out other artists’ work, so don’t hesitate to get involved and ask for feedback.
Recommended Basic Gear Set for Beginners
You don’t need a huge investment to get started in offcamera flash. Here’s the kit I recommend for a basic, effective setup:
- 1 Midrange Speedlight: Pick one that offers both TTL and manual modes, so you can grow into more advanced techniques.
- Wireless Trigger & Receiver: Make sure it’s compatible with your camera brand.
- Adjustable Light Stand: Stability matters, and a stand that folds up small is helpful for storage.
- Basic Softbox or Umbrella Modifier: A simple umbrella is affordable and easy to set up for soft, flattering light.
- Rechargeable AA Batteries: Essential for longer shooting sessions without buying tons of singleuse batteries.
This kit fits in most backpacks, is easy to pack up, and can be customized with more flashes or different modifiers as you get more comfortable. As your needs change, you can add items like wireless remotes, extra flashes, and compact reflectors without reworking your entire gear bag.
Common Questions About Off-Camera Flash for Beginners
I get lots of questions about offcamera flash, both from beginners and people thinking about upgrading their existing setup. Here are answers to a few popular ones:
Question: Do I need expensive gear to get good results?
Answer: Not at all. Even simple flash kits and inexpensive umbrellas can take your photos up a notch. The key is to practice and experiment with your existing gear, working on technique rather than worrying about having top-of-the-line tools.
Question: How do I avoid harsh shadows?
Answer: Using larger modifiers like softboxes or umbrellas can soften shadows nicely. Bringing the light closer to your subject also helps smooth out the transition from light to dark. If you’re indoors, try bouncing your flash off a neutral-toned wall or ceiling as an extra quick fix.
Question: How far away can I place my flash?
Answer: Most wireless triggers work at least 30–100 feet, but the effective distance also depends on how powerful your flash is and what modifier you use. Always test your setup at different distances. Environments with lots of radio interference or obstructions might change your results.
Question: Can I mix brands for my triggers and flashes?
Answer: Sometimes, but it’s often simpler to stick with brands that are known to play nicely together, or to buy all from the same system. This avoids compatibility headaches. If you must mix brands, double-check compatibility charts or forums before buying.
Starting with a simple setup and growing your skills bit by bit is both fun and practical. Offcamera flash gives you creative freedom and the power to shape light in your own unique way. That’s what made me fall in love with it. With a little practice and patience, the techniques you pick up will make a real difference in your photos, no matter what you love to shoot. Keep experimenting, don’t be afraid to make mistakes, and you’ll see improvement faster than you might expect.