Long exposure photography opens up creative possibilities for both urban and nature scenes. By stretching out the length of time the camera’s sensor is exposed to light, I can capture movement and subtle changes in a way that’s impossible with a standard snapshot. The result is often striking, whether it’s silky water over rocks, glowing trails from city traffic, or star-streaked skies. I want to walk you through the essentials of creative long exposure work, especially when you’re shooting in cities or out in nature.
Getting Started with Long Exposure Photography
Long exposure photography relies on keeping the camera’s shutter open longer than you normally would. This allows you to blur moving elements and selectively capture stillness. In cities, this might mean light trails from cars or flowing crowds. In nature, I often use long exposures for waterfalls, clouds, or oceans to create a dreamy or dramatic look.
To get started, I make sure I understand some basics. First, stability is really important; any shake will show up in the image. A tripod is my best friend. I also use a remote shutter or my camera’s timer to avoid jolting the camera when I press the button. Learning to read the light and adjust settings like ISO, aperture, and shutter speed helps me control the final outcome. Experimenting with manual controls early on really builds understanding and helps set a good foundation for more complicated shots later.
Essential Gear for Long Exposure Photography
Even though some gear can feel technical, I try to keep things practical. My core kit always includes:
- Sturdy Tripod: Stops unwanted movement and keeps shots sharp.
- Remote Shutter or Intervalometer: Lets me trigger the shot without touching the camera. Intervalometers are helpful for making timelapse sequences or extremely long exposures.
- Neutral Density (ND) Filters: These darken the lens, letting me use slow shutter speeds even in daylight. ND filters come in different strengths based on how much light they block.
- Camera with Manual Controls: I need to be able to set my ISO, aperture, and shutter speed independently. Most DSLRs and mirrorless models work, and some advanced phone cameras offer manual mode too.
- Lens Cloth and Rain Cover: Especially outside, water spots and dust can sneak into the shot during long exposures.
For postprocessing, I usually have photo editing software ready, like Lightroom or Photoshop, to fine-tune contrast, color, and exposure. A good backpack also helps keep all this gear safe and organized.
Core Techniques for Urban and Nature Scenes
Choosing the right long exposure technique depends on my subject and the effect I’m aiming for. Here are some favorites:
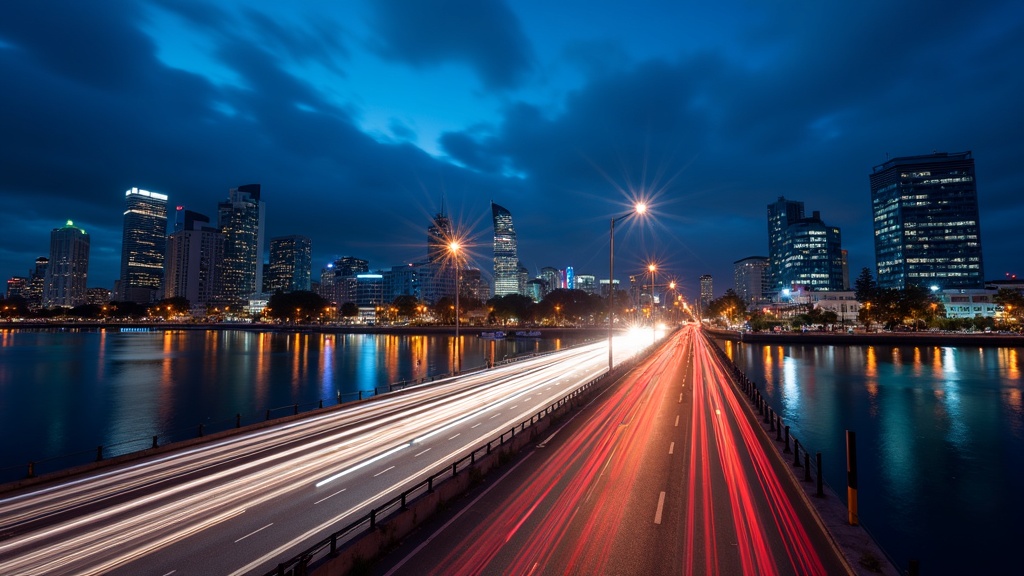
- Traffic Light Trails: In busy city streets, I set up before sunset or at night. Using shutter speeds from 10 seconds to a minute (or longer) lets me catch continuous streaks as cars go by. I look for spots with lots of moving lights. For smoother lines, I try lower ISO and a small aperture (higher f-stop), which also helps avoid overexposing bright lights.
- Smoothing Water: At rivers, oceans, or waterfalls, slow shutter speeds turn choppy water into a silky blur. Timing depends on the light and flow, but 1-30 seconds is a good starting point. ND filters work really well here to keep exposures long, especially in the daytime.
- Cloud Movement: If clouds are rolling across the sky, exposures of 30 seconds to several minutes will show their paths as dramatic streaks. Sunset and sunrise are especially nice for this since colors get richer. On stormy days, fast-moving clouds can add a dramatic mood to your images.
- Light Painting and Star Trails: I sometimes add my own light during an exposure by waving flashlights or sparklers. In clear, dark locations, keeping the shutter open for several minutes (or stacking shots later) gives me spiraling star trails over landscapes or city roofs.
Each environment offers its own creative options. City shots often have enough light for vivid colors and sharp architectural details, while nature scenes benefit from motion in water and sky.
Step-by-Step Guide to Shooting Long Exposure Photos
I’ve found this step-by-step workflow helpful for getting consistent long exposure images:
- Scout Your Location: Arrive early and look for good angles, leading lines, and safe spots to set up gear. I watch for interesting backgrounds and moving subjects. Consider how the changing light will affect your shot, especially at sunrise or sunset.
- Set Up the Tripod: Place it on solid, level ground. Check for nearby vibrations or wind that might shake things. Extending only the thicker tripod legs when possible adds more stability.
- Attach ND Filters (if needed): Put these on before framing the shot to avoid changing the composition later. Sometimes I experiment with different filter strengths to see what effect I like best.
- Compose and Focus: Set up my framing, focus manually if possible, and then switch autofocus off so nothing shifts during the exposure. Double-check focus after applying ND filters since they can make the viewfinder very dark.
- Set Exposure: Start with your base settings: low ISO for less noise, aperture as needed for depth of field, and then adjust shutter speed to control the motion effect. I use the camera’s histogram to avoid blown highlights or lost shadows.
- Trigger the Shutter: Use a remote, intervalometer, or camera timer. Wait out the exposure, and review your shot. If needed, make small adjustments and try again until it looks right. Sometimes waiting for the perfect moment, like a car passing or a break in tourist crowds, makes all the difference.
Refining this process can make a big difference in getting the final image I want, especially when light changes quickly like during dusk or dawn.
Common Challenges and How I Overcome Them
I’ve hit a few stumbling blocks in long exposure work. Here’s how I manage them:
- Wind and Vibration: Even a bit of movement ruins sharpness; I weigh down my tripod with a bag, or shoot from behind barriers if possible.
- Light Leaks: Long exposures can admit stray light through the camera’s viewfinder. Covering the viewfinder with built-in shields or tape solves the issue. A scarf or cloth also helps if you’re in a pinch.
- Overexposure: Bright spots can blow out easily. I bracket exposures (take several shots at different brightness levels) to be safe, or use exposure compensation to tone things down.
- Timing: Patience helps; sometimes the best moments require waiting for the right cloud movement or car pattern. I set up early and enjoy the process. Weather apps and sun calculators help me plan the right timing for dramatic skies or busy traffic.
The more I experiment, the easier it gets to predict and work around these challenges. Practice in various weather and lighting deepens my confidence. Trying new locations, times of day, or even night shots introduces fresh challenges and opportunities.
Creative Techniques and Tips for Standout Shots
Trying out creative tweaks has taught me a lot. Some ideas that keep my long exposure photography fresh:
Stacking Multiple Exposures: Combining several shorter exposures in postprocessing creates a super clean image, especially helpful in crowded places where I want to erase moving people or cars. This technique also helps reduce digital noise in nighttime shots.
Using Reflections: On wet streets or near water, long exposures bring out shimmering reflections that can look beautiful, especially with city lights or colorful skies. After a rainstorm, city scenes become full of color when lights bounce off the pavement.
Mixing Natural and Artificial Light: I often plan shoots right after sunset (blue hour), so city lights and residual daytime color mix together. In nature, I add small lights, like headlamps tucked into rocks, for touches of glow around waterfalls or trails.
Intentional Camera Movement: Sometimes I break the “keep it steady” rule on purpose, moving or even twisting the camera gently during the exposure for artsy effects, especially with bright city lights. Light sources become colorful streaks and abstract patterns. Experimenting with this technique can create surprising results unique to each scene.
Looking for inspiration from other photographers and coming up with my own experiments has really opened up what’s possible with long exposure. Sharing results and asking for feedback online helps me keep learning and improving. I often join online communities, read blogs, and check out galleries to find new ideas that I can try in my own style.
Choosing the Best Equipment for Your Long Exposure Adventure
The right equipment helps me enjoy the shooting process even more. Over time, I’ve added upgraded filters with less color cast, sturdier tripods, and faster remote triggers to my kit. Entrylevel gear can get you started, but investing in a few quality pieces like a good tripod or a set of ND filters will make a difference.
In realworld shooting, a compact but stable tripod fits in my daypack for hikes, while an ultradark ND filter (like 10-stop or 15-stop) lets me take minuteslong exposures even on bright city days. A wideangle lens works well for dramatic city perspectives and sweeping landscapes, while a midrange zoom helps me focus on details like waterfalls or reflections.
- Urban Photography: Look for a lightweight setup that’s easy to move. Architecture and traffic benefit from wide lenses and strong ND filters.
- Nature Photography: Weatherresistant equipment goes a long way, and I keep extra lens cloths handy for mist or spray near water.
- Phone Photography: Besides cameras, today’s advanced phone apps let me control exposure, and clip-on ND filters are surprisingly handy. Some apps even offer built-in long exposure processing options.
Accessories like a headlamp, backpack with padded compartments, and a microfiber towel make outdoor sessions more enjoyable and help protect your gear on the go.
Frequently Asked Questions
When I was starting out, these were the questions I had most about long exposure photography:
Question: How do I calculate the correct exposure time when using ND filters?
Answer: Most ND filters list a “stop” value. I use simple apps or ND filter charts to translate my base shutter speed to the extended value. I also take a few test shots to make sure the exposure feels right. Sometimes trial and error with digital previews is the easiest way to dial it in.
Question: What should I do if my photos always look blurry?
Answer: Check for tripod movement, wind, or camera shake when pressing the shutter. Using a remote or timer almost always solves this, and making sure the ground is solid helps a lot. Adding a small sandbag to the tripod can further improve stability, especially on windy days.
Question: When should I use noise reduction?
Answer: Long exposures can increase digital noise, especially at night. In-camera noise reduction is handy, but I mostly use editing software later to reduce noise without losing sharp details. Shooting at the lowest ISO helps reduce noise in-camera too.
Long Exposure Photography and Creativity
There’s something really satisfying about capturing time in a single frame. Long exposure lets me show the city’s motion or nature’s calm in a way that’s unique and memorable. With the right gear and a bit of patience, I can experiment with light and movement to tell my own story through each image. The best part is, there’s always a new technique or setting to try next time I pick up my camera. If you’re new, don’t be afraid to experiment—even mistakes can lead to eye-catching results you didn’t expect. So, grab your camera, find a cool spot, and let your creativity lead the way as you capture the beauty of motion and time.