Learning how to use the manual settings on a DSLR camera can make a big difference in landscape photography. When I first picked up my DSLR, landscape photos often came out too bright, too dark, or just a bit bland. Once I started to understand how manual modes work, I saw a real improvement in color, sharpness, and creativity. Getting started might feel overwhelming, but adjusting the basics like ISO, aperture, and shutter speed becomes second nature with some practice. In this guide, I’m going to walk you through the main manual DSLR settings that will help you take better landscape shots—even as a beginner.
Understanding Your DSLR for Landscape Photography
A DSLR camera can feel packed with buttons, dials, and menus. Learning what each does is helpful, but for landscape photography, I focus on a few key settings. These basics include ISO, aperture, shutter speed, and white balance. Each one changes how my final photo looks.
Manual settings give me total control over exposure. With this control, I get to decide how much light hits the camera sensor and how everything in the frame appears. Unlike using auto mode, manual mode lets me adjust everything to fit the scene, the light, and the mood I want to create. Once you practice enough, you’ll get a feel for how each setting changes your photos. The more you explore these options, the more creative control you’ll have when aiming for those stunning landscapes that look just as impressive as the real view.
Essential Manual DSLR Settings for Landscapes
- ISO: This adjusts how sensitive the camera sensor is to light. I usually keep it as low as possible, like ISO 100 or 200, to keep the image crisp and avoid grainy noise.
- Aperture (f-stop): The aperture controls the size of the lens opening. A higher f number, like f/8 to f/16, keeps the landscape sharp from front to back.
- Shutter Speed: This setting controls how long the shutter stays open. In bright light, I use a faster shutter speed. For early morning or late evening shots, a slower shutter speed can help capture enough light. If I want to blur moving water or clouds, I use an even slower speed for that signature, artistic effect.
- White Balance: Picking the right white balance helps colors look natural. I set it to ‘Daylight’ or adjust it manually depending on the light conditions.
These four controls work together. Changing one often means I need to adjust the others. Getting used to how they affect each other is super important for landscape photos that really pop. Over time, making tiny changes to these settings will help you create effects and moods that bring your vision to life, whether you want vibrant mountains or soft, mellow sunsets.
Step-by-Step: Taking Your First Manual Landscape Photo
When I’m on location getting ready to shoot a landscape, I always use the same checklist. It keeps things simple and helps me avoid missing steps. Here’s how my process usually goes, and how you can jump into manual shooting too:
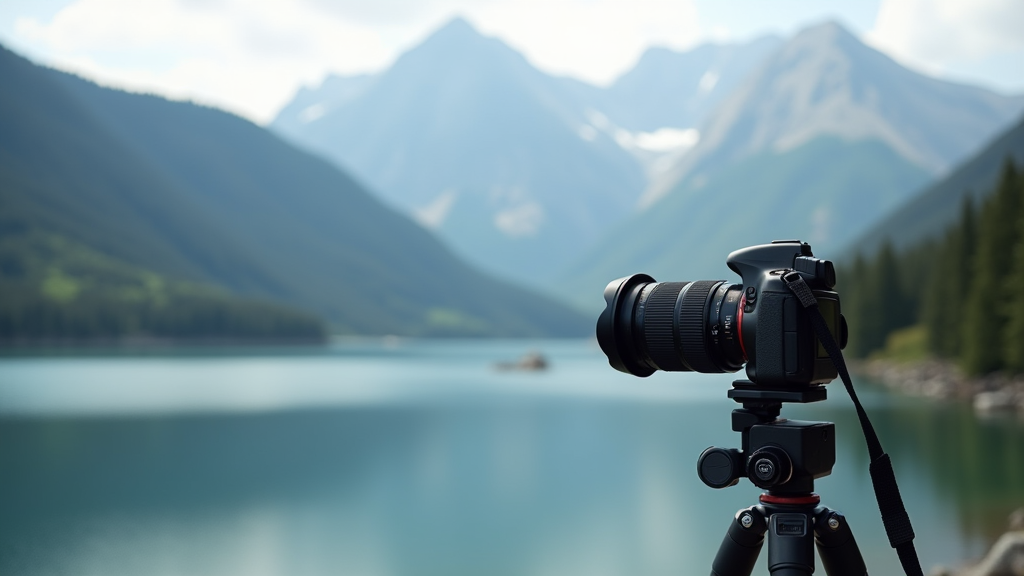
- Choose a Stable Tripod: Clear, sharp photos are easier to get if my camera isn’t shaking. A tripod is a lifesaver, especially for long exposures. It lets your camera stay steady while you play with slower shutter speeds, and gives you the freedom to frame your shot perfectly.
- Set the Camera to Manual Mode (M): This puts me in control of all the main exposure settings. By using manual mode, you control your camera instead of letting the camera guess what you want.
- Start with Base Settings: I often begin at ISO 100, aperture f/11, and shutter speed around 1/60s in normal daylight. These are solid starting points for landscape photography and easy to adjust afterward.
- Compose the Shot: I look for leading lines, interesting foreground elements, and avoid clutter at the edges. Adding rocks, flowers, or winding pathways in the foreground creates depth. Try moving around your scene to create the strongest composition.
- Adjust Exposure:
- If the image is too bright, I use a faster shutter speed or a higher f number.
- If the image is too dark, I slow the shutter or open the aperture a bit.
Use your camera’s light meter as a reference. Don’t worry about being exact at first—the key is to take a shot, check it, and tweak your settings as needed.
- Check the Histogram: The histogram shows if my shadows or highlights are getting lost. I aim for a balanced graph with nothing bunched up at the edges. If you see spikes at either end, some details are getting lost, so tweak your exposure accordingly.
- Fine-Tune and Shoot: Once exposure looks good, I capture a few shots at slightly different settings to make sure I have options. This approach, often called “bracketing,” helps avoid missing the best shot due to changes in light or mistakes in exposure.
Repeating this process helps me stay focused. I end up with more keepers, less frustration, and more chances to spot creative compositions as I get comfortable with my settings.
Challenges and Tips When Shooting Landscapes Manually
- Light Changes Quickly: Early morning and late afternoon offer beautiful light, but it can change fast. I have to be ready to adjust my settings on the fly. It’s a good idea to arrive early and be patient while waiting for the best light.
- Wind and Movement: Tall grass, trees, and water move in the breeze. Sometimes this adds life to a photo, but if I want a sharp image, I use a faster shutter speed or wait for a calm moment. If you like the blurry look of movement, slow your shutter for creative effects.
- Lens Choices: A wideangle lens captures more of the view. It helps include dramatic skies and sweeping scenery, which are all important elements in landscape photos. Experiment with different lenses to see how your field of view changes.
- Filter Use: Neutral density (ND) filters control the amount of light entering the lens. This is handy for long exposures of water or clouds, even in daylight. You might also try a polarizing filter to step up color saturation and reduce glare.
- Keeping Lenses Clean: Outdoor shooting means dust, rain, and fingerprints happen. I keep a microfiber cloth handy to clean my lens as needed. A clean lens keeps your shots sharp and your colors vibrant.
- Patience: Waiting for the right moment, like the sun breaking through the clouds, is often worth it. Some of my favorite shots happened because I waited longer than I thought I’d need to. Don’t be afraid to explore new angles or return to the same location more than once to capture different moods.
ISO and Image Noise
Using a low ISO is the easiest way I know to make sure my landscape photos are sharp and detailed. High ISO can make images look grainy, especially in shadowy areas. If conditions are dark, I use a tripod so I can stick with a lower ISO and avoid blur. Remember, a little patience in setting up the shot is better than fixing noise later on the computer.
Aperture and Depth of Field
Landscape photos typically look better when the whole scene is in focus, from the wildflowers at my feet to the mountains in the distance. Setting the aperture to a higher f number (like f/11 or f/16) gives me that deep focus. But if it’s very dark, I may need to use a slightly wider aperture and then adjust shutter speed to balance the light. It’s all about finding that sweet spot between detail and brightness, so take some test shots to track down your best results.
Shutter Speed for Movement
Fastmoving clouds or running water make a landscape look dynamic. By slowing down the shutter speed, I can turn flowing water into a silky blur or show cloud movement. To avoid camera shake, I use a tripod and sometimes a remote shutter release so I don’t bump the camera when taking the shot. If you don’t have a remote, the camera’s timer works just as well for handsfree shooting.
Handy Accessories for Manual Landscape Photography
Certain accessories help me get more reliable results and stay creative while shooting landscapes:
- Tripod: Steadies the camera for longer exposures and sharper images. A good tripod is your best friend on uneven ground or windy days.
- Remote Shutter Release: Lets me trigger the exposure without touching the camera. This tool is great for keeping shots steady in all kinds of scenarios.
- Lens Filters: Polarizing filters make skies bluer and cut reflections, while ND filters are useful for long exposures. Experiment with both types to add drama or subtlety to your images.
- Spare Batteries: Cold weather and long shoots can drain batteries quickly—so I always carry a backup or two.
- Weather Protection: I keep a small rain cover or plastic bag in my camera bag just in case unexpected showers roll in. Your gear is an investment, so keeping it dry is always a smart move.
These tools make it easy to focus on composition and exposure, instead of worrying about gear limitations. Don’t skimp on accessories—good gear takes your photography game up a notch and gives you confidence in any shooting condition.
Frequently Asked Questions About Manual Landscape Photography
Some common questions always pop up when starting out with manual DSLR settings for landscapes. Here are a few I get a lot, along with practical tips:
What is the best exposure mode for landscapes?
Manual mode gives me the most control, but aperture priority (Av or A) can also work well if I want to quickly set the depth of field while letting the camera handle shutter speed. If you’re in a hurry, try aperture priority first to get comfortable with setting depth and then move on to manual for full control.
Why are my landscape photos blurry?
Blurriness often comes from camera shake. Using a tripod and a remote shutter or self-timer solves this most of the time. Also, checking focus before shooting is really important. If you’re using autofocus, tap to focus on a point about one-third into the scene to keep everything from front to back sharp.
Should I use automatic white balance?
Auto white balance does a decent job, but sometimes the camera misses the right color, especially at sunrise or sunset. I often set white balance to ‘Daylight’ or ‘Cloudy’ so the colors look more natural. Feel free to experiment with manual settings and check your images on the camera’s screen to track down the color mood you want.
Making the Most of Manual Settings for Beautiful Landscapes
Learning to use manual DSLR settings in landscape photography opens up new creative options. I get to shape the image exactly how I want it, whether that means perfect detail, dramatic lighting, or gorgeous color. Getting familiar with manual mode might take a little practice, but it pays off each time I see a landscape photo that really matches how the scene felt in person.
Spending time outdoors, experimenting with ISO, aperture, and shutter speed, and not rushing the process has helped me create landscape photos I’m proud of. Each shoot teaches me new tricks, and every photo is a fresh start. If you stick with it, keep practicing, and don’t get discouraged by a few missed shots, you’ll find your landscapes looking better with every click. Get outside, bring your camera, and make the most of manual mode. You’ll be surprised by the transformation in your images—and the pride you feel when you create something that makes you smile.